Heat Treating a Knife at Home: The Step Every Beginner Gets Wrong
You’ve spent three hours at the forge. Your blade is shaped, tapered, and beautiful. The edge is sharp enough to shave with. You’re excited to use it.
Then you quench it. And then… you’re done, right?
Wrong. And that’s where most beginner knife makers ruin a perfectly good blade.
Heat treatment is where forging skill meets material science, and it’s absolutely unforgiving. You can hand-forge a knife that looks like it came from a professional shop, then destroy it completely in the final hour of work. I’ve done it. Twice. The problem isn’t usually the hardening step—it’s what comes after. It’s tempering, and it’s the step that separates knives that work from knives that shatter in your hand.
Let me walk you through the complete heat treatment process: all three stages, the common mistakes that kill blades, and exactly how to do it right in your home shop.
Why Heat Treatment Matters (And Why It’s Three Steps, Not One)
When you forge a blade, you’re hammering the metal into shape. That hammering creates stress inside the steel—residual strain locked in the crystal structure. You can’t see it, but it’s there, and it makes the steel unpredictable and prone to warping.
Heat treatment fixes this. But it does three different things, and you need all three:
Stage 1: Normalizing relieves that forging stress and refines the grain structure. You heat the blade above its critical temperature and let it air cool. This is calming work—you’re resetting the metal.
Stage 2: Hardening (the quench) transforms the steel’s crystal structure into something incredibly hard. This is where the blade gets its edge-holding ability. But there’s a catch: hard steel is also brittle. Extremely brittle. Glass-brittle.
Stage 3: Tempering is the fix for that brittleness. You reheat the hardened blade to a lower temperature to relieve some of that hardness in exchange for toughness. This is the step that separates a usable knife from a shattered disaster.
Most beginner tutorials skip tempering entirely or rush through it. Some skip it because they don’t understand it. Some because they think hardening is enough. I’ve seen knives break because of this, and I’ve made knives that broke for this reason.
Don’t be that person. Let’s do this right.
Stage 1: Normalizing (The Setup Work)
Before you even think about hardening, normalize your blade 2-3 times. This takes patience, but it matters.
Heat your blade evenly to just above critical temperature. For most simple carbon steels (1080, 1084, 5160), critical temperature is around 1425°F. You won’t have a pyrometer, so use the magnet test: as you heat the blade, periodically touch it with a strong neodymium magnet. When the steel is magnetic, it’s below critical temp. Keep heating. When the magnet no longer sticks—when the steel is non-magnetic—you’re at or very near critical temperature. That’s your target.
Once the blade is non-magnetic, let it air cool completely. No quenching. Just let it sit on a steel table or in a bucket of sand for an hour or two until it reaches room temperature. Then repeat the process two more times.
Why three times? Each cycle refines the grain structure further. The first cycle relieves the major stress from forging. The second and third cycles even out the remaining grain size. This makes the blade less likely to crack during hardening and more likely to hold an edge well after tempering.
Yes, this takes a few hours. Yes, it’s boring. Yes, it matters more than you think.
Stage 2: Hardening (The Quench)
Finding Critical Temperature (Again, Without a Pyrometer)
After your normalizing cycles, do one final heat to critical temperature using the magnet test. Heat the blade evenly—this is crucial. The thick spine heats slower than the thin edge, so move your heat source along the spine more than the edge, or hold the spine closer to the flame. You want the entire blade reaching critical temperature at the same time.
Once the blade is non-magnetic, give it another 10-15 seconds of heat. You want to go slightly above critical temperature (another 25-50°F) to ensure full austenitization. This means the entire crystal structure is transformed and ready for hardening. Not too hot, though—if you overheat, the grain will coarsen and you’ll lose edge retention.
Choosing Your Quench Medium
This matters more than most beginners realize. Different steels need different quench speeds.
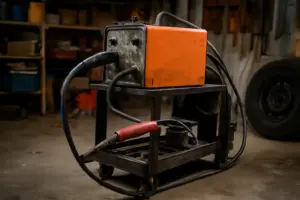
For 1080, 1084, and 5160 steel: use warm canola oil or commercial quench oil like Parks 50. Heat the oil to 120-130°F before quenching. Yes, really—preheat it. Cold oil quenches too fast and causes cracking due to thermal shock. Warm oil gives a gentler quench that’s more forgiving. Canola oil from the grocery store works fine for beginners. It’s cheap and readily available.
For W1 and W2 water-hardening steels, or if you’re working with old files: use water or brine. These steels need a faster quench to harden properly. But be warned: water quenches much faster than oil, and faster quenches are more likely to cause warping and cracking. I recommend beginners start with oil-quench steels (1080/1084) because they’re more forgiving.
Never, ever quench in motor oil. Motor oil produces toxic fumes when it flares up. Commercial quench oil is designed for this. Canola oil is safe. Motor oil is not.
The Quench Itself
This is where precision matters. Here’s the process:
Edge first. Lower the blade into the oil edge-down at a slight angle, then straighten it to vertical. The edge cools faster than the spine, and you want to control that cooling.
Keep the blade fully submerged. Don’t wave it around—this is a common beginner mistake. Waving it creates uneven cooling and warping. Instead, use a gentle figure-8 motion, maybe a few inches of movement, just enough to keep fresh oil flowing past the blade and prevent steam pockets from forming.
Keep it submerged for 10-15 seconds minimum. Some people quench for 20-30 seconds to be safe. The blade should cool completely while in the oil before you pull it out.
Don’t peek. Don’t rotate it to look at it. Keep it submerged and still.
Oil Will Flame Up
Have a steel lid or a piece of sheet metal ready to smother the flames. Have a fire extinguisher nearby—not in your hand, but within arm’s reach. Wear heat-resistant gloves and eye protection. Do this outdoors or in a very well-ventilated shop. Open windows. Open the door. Oil fumes are no joke.
The flames are brief and usually die on their own. But be ready.
Stage 3: Tempering (The Step Everyone Gets Wrong)
Your blade is now out of the oil. It’s hard. Incredibly, glass-hard. And incredibly, glass-brittle.
If you drop it on concrete, it will shatter. Not bend. Not dent. Shatter.
You need to temper it immediately. Within an hour of quenching, ideally. The longer you wait, the more residual stress builds in the steel. Temper it while it’s still warm from quenching, or at least within a few hours.
Temperature Targets
For a utility knife or camp knife: 400°F.
For a kitchen knife or chef’s knife: 375°F. Lower temperature = harder steel = better edge retention, but more brittle. You want to hold an edge longer than you want to absorb impacts.
For a chopper or heavy-use knife: 425°F. Higher temperature = softer steel = more toughness, less edge retention. Better for heavy work where toughness matters more than keeping a razor edge.
Use a kitchen oven. I know, I know—your spouse will not be thrilled. But a kitchen oven is the most practical tool you have. Set it to the target temperature and let it preheat for 20 minutes.
The Two-Cycle Temper
This is the step most beginners skip, and it’s why their blades don’t hold up well.
Put the blade in the oven at your target temperature for 1 hour. Let it heat through completely. After 1 hour, pull it out and let it air cool to room temperature. Don’t quench it again—just let it cool on a table.
Then put it back in the oven for another 1-hour cycle at the same temperature. Heat to temp, hold 1 hour, air cool again.
Why two cycles? During the first temper cycle, the retained austenite (very hard but slightly brittle residual crystal structure left from quenching) converts to tempered martensite. But not all of it converts in one cycle. The second cycle catches the stragglers. One cycle leaves a less stable blade that can become brittle over time or after impact. Two cycles give you a stable, reliable blade.
Yes, this takes 3+ hours of oven time. No, you can’t rush it. Yes, it’s worth it.
Testing Your Temper: The File Test
After tempering, the blade is cool. Now test it.
Take a smooth file (or the spine of an old knife) and run it gently across the edge bevel. It should barely bite—it should mostly skate across the steel with just a little resistance. If the file digs in easily and removes material quickly, you’ve overtempered. The blade is too soft. You need less hardness and more toughness for a knife anyway, but if the file bites too easily, you’ve lost too much hardness.
If the file skates like you’re running it across glass with barely any bite at all, you may have undertempered. The blade is still too brittle. Do another temper cycle at 25°F higher (if you tempered at 375°F, do 400°F for one more cycle). This will reduce the brittleness without losing too much edge retention.
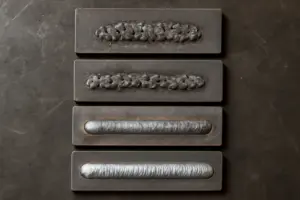
Reading Oxide Colors (Optional But Cool)
If you polish the blade bright before tempering, you can watch the color change as it heats up. Each color indicates a specific temperature range:
Straw or light yellow = 400°F
Brown = 450°F
Purple = 500°F
Blue = 550°F
Above 500°F, you’re getting soft. Blades tempered blue are too soft for most cutting knives—they’re better suited for springs or tools where flexibility matters more than edge retention.
This color method isn’t as reliable as a thermometer, but it’s a helpful visual reference if you want to monitor the temper cycle while the blade is out of the oven.
Common Beginner Mistakes (And How to Avoid Them)
1. Uneven Heating During Hardening
The spine is thicker and heats slower than the edge. If you heat the edge to critical temperature but the spine is still cooler, you’ll get uneven hardening, which causes warping. Move your heat source along the spine more than the edge. Watch the magnet test on both the edge and spine. They should both go non-magnetic at roughly the same time.
2. Cold Quench Oil
Oil at room temperature quenches too fast. Preheat it to 120-130°F. Use a candy thermometer if you have one. If not, the oil should feel hot to the touch but not boiling. This gives a gentler quench and prevents cracking.
3. Skipping the Temper
This is the killer. I’ve made blades that looked perfect after hardening, then shattered during use because I skipped or rushed the temper. The blade is useless if it shatters in your hand. Temper it.
4. Only One Temper Cycle
One cycle leaves retained austenite that makes the blade less stable. Do two. It takes time, but it’s worth it.
5. Not Normalizing Before Hardening
Three normalizing cycles take a few hours, but they prevent warping and cracking during hardening. They’re not optional.
Safety Reminders
Work outdoors or in a very well-ventilated shop. Oil fumes are serious. Have a fire extinguisher rated for oil fires (Class B) nearby—not in your hand, but where you can reach it in one step. Wear heat-resistant gloves, long sleeves, and eye protection. Have a steel lid or sheet metal ready to smother oil flames. Keep a bucket of sand nearby in case the blade falls out of the oil—don’t try to catch a hot blade.
Final Thoughts
Heat treatment is where most beginner knives fail. The forging is romantic and exciting. The heat treatment is methodical and slow. But it’s also where you prove whether you’ve made a tool or a decorative piece of metal.
Normalize. Harden. Temper—twice. Test with a file. Then use your knife knowing it won’t shatter in your hand.
That’s the difference between a blade and a broken promise.
—Jake