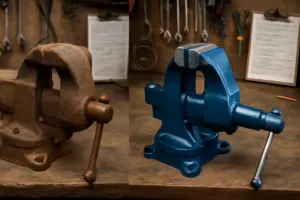
Rebuilding a Vise Screw and Nut: The Part Most People Skip During Restoration
If you’ve spent the last weekend scrubbing rust off a vintage bench vise, wire-wheeling the casting until it gleams, and painting it a beautiful deep red, I want to ask you one tough question: Does it actually work?
I’ve restored dozens of vises over the years, and I can tell you this with absolute certainty—a pretty vise with a worn screw is just a decorative paperweight. It looks fantastic on the bench. It’ll turn heads. But the moment you try to clamp a piece of wood and apply lateral pressure, you’ll feel that sickening play in the movable jaw. The work shifts. Nothing is secure. You’re frustrated, and if you’re honest with yourself, you skipped the most important part of the restoration.
Most vise restoration content online glosses over this. YouTube is full of satisfying videos of people cleaning and painting old vises, but hardly anyone talks about the acme screw and nut—the actual heart of the tool. That’s the part I want to cover today, because getting this right is what separates a truly restored vise from a beautiful hunk of cast iron that doesn’t work.
Why the Screw Matters More Than You Think
The screw mechanism in a bench vise isn’t just another component. It’s the entire functional purpose of the tool. Every bit of clamping force, every ounce of holding power, flows through that screw. When it wears, everything else fails.
Think about the engineering for a second. An acme screw is designed to convert rotational force into linear motion with minimal slop. The nut rides on those threads, and as you turn the handle, it pulls or pushes the movable jaw. If there’s play in that mechanism—if the nut rocks on the screw or the screw itself is worn smooth in places—you lose everything. Your work won’t stay clamped. You can’t apply consistent pressure. The vise becomes unreliable, and an unreliable vise is a dangerous vise.
I’ve seen people spend fifty dollars and five hours restoring a vise, only to give up because they couldn’t get it to work right. Nine times out of ten, they skipped checking the screw and nut.
How to Assess Your Screw and Nut
Before you commit to any repairs, you need to know what you’re working with. Here’s the test I always run.
First, mount the vise securely in a bench or a shop stand. Clamp something in the jaws—a piece of scrap wood is fine. Now, grab the movable jaw and try to move it side to side with moderate pressure. A small amount of play is normal. Everything in the world has some tolerance. But if you can see the jaw visibly shift more than a sixteenth of an inch from side to side, something is worn.
That play can come from two sources. First, the screw and nut themselves might be worn. Second, the slide bar channel that guides the jaw might be enlarged. You can figure out which one is the culprit by rocking the jaw specifically at the slide bar. If the play is concentrated there, the channel is worn. If it’s throughout the jaw movement, suspect the screw and nut.
Hand-tighten the vise fully, then try to turn the handle a tiny bit further. Does it require sudden extra force, or does it ease in smoothly? A worn nut often has a stiff spot or a notchy feel, like the screw is catching on damaged threads.
Finally, look at the screw itself. Unscrew the handle completely and, if possible, slide the movable jaw all the way back. Inspect the exposed length of the screw under good light. Do you see shiny worn patches where the nut has polished the steel? That’s a sign of heavy use and possible wear.
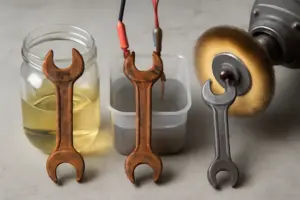
Cleaning the Screw: The Right Way
You can’t assess wear under a layer of rust, so cleaning comes first.
If you’ve got heavy rust, a wire wheel on a bench grinder works quickly, but be careful. Keep the wheel moving, don’t linger in one spot, and wear safety glasses—rust particles will fly. Work in the direction of the thread, not across it.
After the grinder, finish with 400-grit sandpaper by hand. This is important. Take time to sand along the profile of each thread, removing the remaining surface oxidation and revealing the actual screw geometry. This is where you’ll see whether the threads are still sharp or if they’ve been rounded down by a worn nut.
Here’s a mistake people make: they’ll try to re-chase worn acme threads with a die. Unless you know the exact pitch of your screw—and I mean you’re certain, not guessing—don’t do this. Acme threads come in different pitches depending on the screw diameter and the vise model. Re-chasing with the wrong die will make things worse, not better.
The Nut: Usually the Culprit
On quality vises, the nut is made from bronze or brass. The screw is hardened steel. This choice is deliberate. The nut is the softer wear item. It’s designed to fail first because replacing a fifteen-dollar nut is infinitely easier than replacing the whole screw.
After you’ve cleaned the screw, spin the nut onto it by hand. Feel for roughness, catching, or resistance. If the screw slides smoothly through the nut with consistent feel from start to finish, you might be fine. If there are rough spots, tight spots, or if the nut feels loose and rattles even slightly, it’s time to replace it.
Here’s the thing: a worn nut is the most common reason a restored vise doesn’t work properly. People replace everything else, paint the casting, refinish the handle, but they don’t think about the nut because it’s small and not obvious.
Finding Replacement Parts
If you’ve determined the nut needs replacing, you have options.
Contact the manufacturer. Wilton still sells parts for their classic vises. Reach out with your model number, and they can tell you if a replacement nut is available. You might be surprised—many companies kept spare parts catalogs going for decades.
Check eBay and online classifieds. Buy a beat-up vise of the same model, even if it’s rusted beyond recognition. Use it as a parts donor. You’ll get the correct nut, and you might also get extra slide bars or a spare thrust washer. I’ve done this more times than I care to admit. Sometimes you’ll find a vise for thirty or forty dollars that someone is just trying to get rid of.
Machine a new nut. If you have access to a lathe, you can turn a new nut from bronze or brass bar stock. It’s a straightforward job—bore the hole, cut the internal acme threads, and drill mounting holes if your nut style requires them. If you don’t have a lathe, find a local machine shop. Most will quote you thirty to sixty dollars for a custom nut, which is still far cheaper than a new vise.
Cleaning and Preparing the Screw for Reassembly
Once you’ve got your new nut (or confirmed your old nut is still good), give the screw a final clean and some thought about lubrication.
Don’t use grease on the threads. I can’t stress this enough. Grease collects grit, dust, and metal particles. Over time, you’re running your nut over an abrasive paste, which accelerates wear. Instead, use anti-seize compound on the threads. It’s designed for this—it lubricates, prevents corrosion, and doesn’t trap contaminants.
Some old-timers swear by graphite powder. A light dusting of graphite on the threads works surprisingly well. It’s dry, it stays clean, and it reduces friction.
For the slide bars, a single drop of light oil on each side is sufficient. Wipe away any excess. You want lubrication, not a dripping mess that collects sawdust.
The Thrust Washer: The Forgotten Detail
There’s a small component that I bet you didn’t know existed until just now: the thrust washer or bearing. It sits between the screw collar���the part at the back of the screw that spins with the handle—and the vise body. Its job is to let the screw spin smoothly without binding.
On old vises, these washers are often missing, worn completely flat, or made of hardened steel that’s become pitted. If your screw turns with grinding or binding, the thrust washer is likely the cause.
Replacement washers are typically bronze or PTFE. A bronze washer costs a few dollars. PTFE (plastic) washers are also inexpensive and work beautifully. Either one is a worthwhile upgrade. If you’re machining a new nut anyway, ask the shop to turn you a new bronze thrust washer while they’re at it.
Reassembly and Testing
When you’re ready to reassemble, take your time and do things in order.
First, ensure the slide bars are properly aligned. The movable jaw should slide freely with minimal wobble. If it’s stiff, check for bent bars or debris in the channels.
Install the new (or refurbished) nut on the screw, apply your chosen lubricant, and carefully thread the assembly back into the vise body. The screw should spin smoothly through its full range of motion from fully open to fully closed.
Pay attention to the spring tension that holds the jaw open. Depending on your vise model, this might be a coil spring or a leaf spring. It should provide enough resistance that the jaw doesn’t fall open on its own, but not so much that it’s hard to open by hand.
Once everything is assembled, clamp a block of wood and test. Push and pull the clamped work laterally. There should be virtually no movement. Open and close the vise through several complete cycles. The handle should turn smoothly and require consistent effort throughout.
If you feel catching or binding, don’t ignore it. Disassemble and investigate. Nine times out of ten, it’s a small burr on the screw that a bit of fine sandpaper will fix.
The Bottom Line
Your restored vise is only as good as its screw and nut. A beautiful casting with a worn mechanism is decoration, not a tool. If your freshly painted vise has a wobbling handle or a jaw with play, you’ve already identified the problem. Go back, assess the screw, clean it properly, replace the worn nut, and do the job right this time. It’ll take an afternoon, maybe a few dollars in parts, and it’ll transform that vise from a curiosity into a reliable tool that’ll outlast us all.