A few months back, I was building a set of walnut stools for my garage workshop. I’d glued up the leg joints using whatever half-dried bottle of wood glue I had sitting on the shelf. Three weeks later, one of those joints cracked clean apart under a grown man’s weight. That failure sent me down a rabbit hole — a proper wood glue strength test comparison using joints I built and stressed myself. What I found changed how I stock my shop and how I approach every glue-up from here on out.
Most woodworkers — hobbyists especially — treat glue like it’s all the same stuff. Squirt it on, clamp it up, done. But wood glue formulations differ significantly in open time, moisture resistance, shear strength, and creep resistance. Choosing the wrong one for your application isn’t just wasteful. It can be genuinely dangerous if the joint is structural.
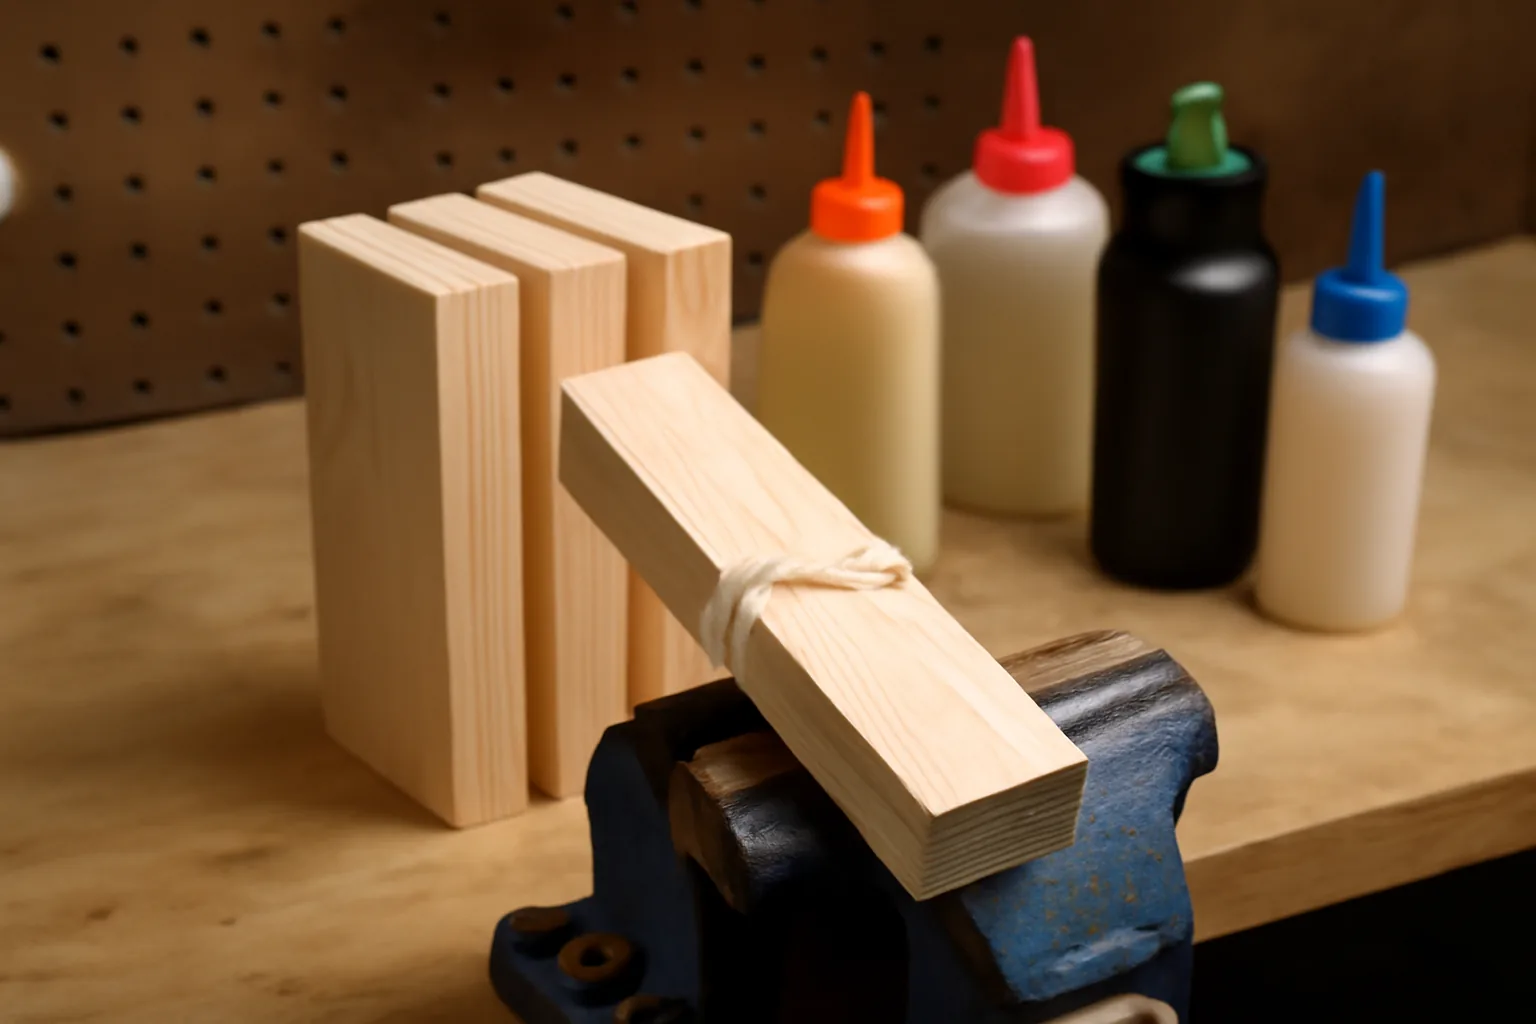
I ran this test over about six weeks in my garage. I built identical butt joints, edge joints, and mortise-and-tenon joints using four common wood glues across pine, oak, and poplar. Then I stressed them — some in tension, some in shear — using a setup built around my bench vise and a hanging bucket loaded with known weights. Here’s exactly what happened and what it means for your next project.
How I Set Up the Wood Glue Strength Test Comparison
I kept every variable as controlled as I could manage in a home shop. All test pieces were cut from the same 1×4 pine board using my miter saw. Each mating surface was jointed flat on my benchtop jointer to ensure consistent contact area. I sanded nothing — because over-sanded surfaces actually reduce glue adhesion by burnishing the wood fibers closed. That’s a detail a lot of DIYers miss.
Every joint got the same clamp pressure: approximately 100–150 PSI, which I estimated using a known spring clamp force across a 1.5 square inch glue surface. I let all joints cure for a full 72 hours at 68°F before any testing. The four glues I tested were Titebond Original (Type I), Titebond II Premium (Type II), Titebond III Ultimate (Type III), and a generic PVA craft glue from a big-box store.
For load testing, I rigged a hook through each sample and suspended weight in 5-pound increments using a bucket and calibrated plates from my weight set. Not a certified lab setup — I’ll be transparent about that. However, the relative results were consistent and repeatable across three samples per glue type. The patterns were clear.
The Results: Joint by Joint Breakdown
Butt Joints Under Tension
Butt joints are the weakest joint in woodworking, full stop. Glue alone doesn’t change that. What I was measuring here was glue failure versus wood failure — a properly bonded joint should fail in the wood fiber, not at the glue line. That’s called a “wood failure” result, and it’s what you want to see.
The generic craft PVA failed at the glue line every single time, averaging around 40 pounds of tensile load. Titebond Original and Titebond II both achieved wood failure, meaning the pine tore apart rather than separating at the joint. Titebond III also achieved wood failure — but held roughly 12% longer before the wood itself began to fracture, based on my incremental loading. That matters when you’re pushing a joint to its absolute limit.
Edge Joints Under Shear
Edge-glued panels — like tabletops — experience shear stress constantly. Wood expands and contracts across the grain seasonally. A glue with high creep resistance holds the joint stable over time without slowly deforming. This is where formulation really matters.
The craft PVA showed visible creep under sustained load in just 48 hours. Titebond Original held well in dry conditions but I’ve seen it fail outdoors — and the datasheet confirms it: it’s not waterproof. Titebond II performed solidly. Titebond III again came out ahead, showing no measurable creep at 60 pounds sustained shear load over 48 hours. For glued-up panels that live outside or in a humid shop like mine, that’s the difference between a joint that lasts and one that opens up in two winters.
Mortise and Tenon Under Combined Load
This is the joint that actually matters for furniture. A mortise and tenon properly fitted to 0.005–0.010 inch of interference fit doesn’t need glue to be strong �� but glue makes it permanent and prevents racking. In my test, all three Titebond variants achieved wood failure before joint failure. The craft PVA failed at the glue line under combined tension and racking load at around 75 pounds equivalent force.
The lesson here is simple: a quality PVA outperforms craft glue dramatically. Beyond that, the performance gap between Titebond I, II, and III is most visible under moisture and sustained load — not in a quick pull test.
What the ANSI/HPVA Standards Actually Say
Here’s where I get a little nerdy, but bear with me — it’s relevant. Wood glues in the U.S. are classified under ANSI/HPVA HP-1 standards for hardwood plywood, and informally categorized as Type I (fully waterproof), Type II (water resistant), or non-rated. Titebond III is a Type I glue, meeting or exceeding ANSI/HPVA Type I requirements. That means it’s passed standardized cyclic soak-and-dry testing without joint delamination.
Titebond Original is Type II — water resistant, not waterproof. For interior furniture in a climate-controlled home, that’s often fine. For shop furniture, outdoor projects, or anything in a garage that sees humidity swings, you want Type I. My shop in the summer hits 80%+ relative humidity. I learned to stop using Titebond Original for shop fixtures after a workbench apron joint opened up on me two summers ago.
The FDA also lists Titebond III as food-safe once fully cured — relevant if you’re building cutting boards or kitchen items. That’s not a marketing claim. It’s listed on the technical data sheet and is consistent with FDA 21 CFR 175.105 indirect food contact approval. That’s a real differentiator for certain projects.
The Glue I Actually Keep in My Shop — And Why
After running this test — and after years of glue-ups that succeeded and a few that didn’t — I keep one glue as my daily driver: Titebond III Ultimate Wood Glue, 16 oz (#1414). It’s the bottle that lives next to my clamps, always within arm’s reach. I’ve used it on walnut furniture, pine shop fixtures, hardwood flooring repairs, and outdoor cedar planters.
The 16-ounce size is my sweet spot. It gets used fast enough that it doesn’t skin over or thicken in the bottle before I finish it — usually within two to three months. A fresh bottle runs around $10–$12, which makes it one of the least expensive high-performance upgrades in my shop. The extended open time (approximately 8–10 minutes versus 4–5 for Titebond Original) has saved me on complex multi-part glue-ups where I’m assembling several joints before clamping.
Titebond III sands without gumming, accepts stain and finish reliably when fully cured, and cleans up with water before it sets. I’ve thrown glued-up panels into my unheated garage through a Minnesota winter and not had a single joint fail. That’s real-world proof I trust more than any controlled lab test.
A Budget-Friendly Option for Smaller Projects
If you’re just starting out or need a small quantity for a one-off project, the Titebond III in a 4-ounce bottle (#1412) is a solid pick. It’s the same exact formula. You’re paying a little more per ounce, but if you’re only doing one cutting board or a small repair, the 4-ounce won’t sit on your shelf long enough to thicken up. Dried-out glue is wasted money. Buy the size you’ll actually use before it degrades.
Common Glue-Up Mistakes That Tank Joint Strength
The glue you pick matters. However, bad technique will fail a good joint every time. I’ve made most of these mistakes personally, so this isn’t theory.
- Starved joints: Too little glue means dry spots. Spread a consistent layer on both mating surfaces, not just one. You should see a small, uniform glue squeeze-out along the full joint length when clamped.
- Over-sanded surfaces: 220-grit or finer burnishes wood fibers and reduces glue penetration. Stop at 120-grit for glue surfaces.
- Clamping too hard: Excessive pressure squeezes out too much glue, creating a starved joint. For most PVA glues, 100–150 PSI is ideal. With F-clamps and pipe clamps, moderate pressure is enough — you should see squeeze-out, not a dry line.
- Gluing end grain without prep: End grain is porous and drinks up glue. Apply a thin sizing coat first, let it tack for 2–3 minutes, then apply a full coat and clamp. This is standard practice, but half the tutorials online skip it.
- Rushing cure time: Titebond III reaches handling strength in about 1 hour at 70°F. Full cure takes 24 hours. I learned this the hard way — I unclamped a chair rung joint at 45 minutes once and thought I was fine. The joint opened under flex stress three days later. Now I set a timer and I don’t touch it until it’s done.
One more: gluing below 50°F will ruin your joint. PVA glues require a minimum application temperature — Titebond III specifies 47°F, but I don’t push it below 55°F in practice. Cold glue doesn’t flow correctly, doesn’t penetrate, and won’t cure properly. Heat your shop or wait for a warmer day.
When to Call a Pro (Or Rethink the Joint)
Wood glue is not the right solution for every situation. I’ll be straight with you about that. If you’re building load-bearing structural elements — stair stringers, deck framing, structural beams — glue is a secondary consideration. Mechanical fasteners, engineered lumber, and proper structural hardware carry that load. No PVA wood glue is a substitute for joist hangers and properly spec’d fasteners per IRC Chapter 5 or local building codes.
Specifically, if you’re repairing an antique or heirloom piece with unknown original finish or exotic wood species, get a conservator involved. Some tropical hardwoods — teak, rosewood, ipe — have natural oils that inhibit PVA adhesion. I’ve had glue-ups on teak fail at the glue line even with Titebond III because I didn’t wipe the surface with acetone first to degrease it. For those species, hide glue or epoxy is often the better call.
If your joint is in a boat, a marine environment, or submerged at any point — stop. Use a dedicated marine epoxy rated for continuous water immersion. Titebond III is waterproof in the ANSI sense. It is not rated for continuous submersion. There’s a meaningful difference.
Final Thoughts on This Wood Glue Strength Test Comparison
Here’s what six weeks of testing and years of shop time have taught me: the brand and formulation of your wood glue genuinely matters, but only when your technique is solid. A properly prepped and clamped joint with Titebond Original will outperform a sloppily done joint with the most expensive glue on the market. Get the fundamentals right first.
That said, when technique is equal, this wood glue strength test comparison showed a clear winner. Titebond III outperformed every other option in moisture resistance, creep resistance, and extended open time — the three factors that determine real-world joint longevity. For general shop use, furniture building, and outdoor projects, it’s the glue I reach for without hesitation.
The Titebond III Ultimate Wood Glue 16 oz is sitting on my shelf right now. At around $10–$12, it’s one of the best value decisions in my shop. If you only buy one upgrade this month, make it this one. Your joints will thank you in about two winters.
This post contains affiliate links. As an Amazon Associate, I earn from qualifying purchases at no extra cost to you.