
Heat Treating a Knife at Home: The Step Every Beginner Gets Wrong
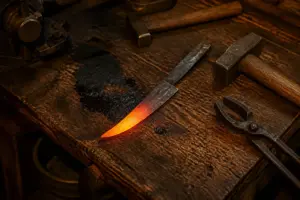
Three hours at the anvil. Your blade is shaped, tapered, and it catches the light just right. The edge will shave arm hair. You’re ready to use it.
Then you plunge it into oil. And that’s the finish line, correct?
Incorrect. And that’s precisely where most people starting out wreck an otherwise solid blade.
Heat treatment sits at the intersection of forging craft and metallurgy, and it shows no mercy. You can hand-forge a knife that rivals anything in a professional catalog, then obliterate it completely during the final stage of the process. I’ve been there. Twice over. The culprit usually isn’t the hardening itself—it’s what happens next. It’s the temper cycle, and it’s what divides a functional blade from one that shatters the moment you use it.
I’m going to take you through the entire heat treatment sequence: all three distinct phases, the errors that destroy blades, and precisely how to execute it correctly within a home shop environment.
Why Heat Treatment Matters (And Why It’s Three Steps, Not One)
Forging a blade means striking the metal into shape. That striking introduces tension throughout the steel—stress locked inside the crystalline matrix. It’s invisible, yet present, and it leaves the metal volatile and susceptible to unwanted deformation.
Heat treatment remedies this. However, it accomplishes three separate objectives, and you must execute all three:
Stage 1: Normalizing dissipates forging tension and fine-tunes grain composition. You bring the blade past its critical point and permit it to cool gradually. It’s methodical—you’re reconditioning the material.
Stage 2: Hardening (the quench) restructures the steel’s crystalline lattice into something extraordinarily hard. This is how your blade gains its capacity to preserve sharpness. But there’s a drawback: hardened steel becomes dangerously brittle. Severely brittle. Like-glass brittle.
Stage 3: Tempering counteracts that brittleness. You warm the hardened blade to a reduced temperature to give up some hardness in exchange for flexibility. This separates a functional knife from a blade prone to fracture.
Plenty of beginner resources either omit tempering or treat it carelessly. Some folks overlook it altogether due to misunderstanding. Others assume hardening suffices on its own. I’ve witnessed blades fracture because of this omission, and I’ve produced blades that fractured for precisely this reason.
Don’t end up that route. Let’s get this done properly.
Stage 1: Normalizing (The Setup Work)
Prior to considering hardening, run your blade through 2-3 normalization rounds. It demands patience, however it pays dividends.
Distribute heat across the blade uniformly to just beyond critical temperature. For most straightforward carbon steels (1080, 1084, 5160), critical temperature sits around 1425°F. A pyrometer probably isn’t in your kit, so rely on the magnet test: as heat accumulates in the blade, touch it periodically with a strong neodymium magnet. When the steel stays magnetic, you’re below critical temp. Raise the heat more. When adhesion ceases—when the steel turns non-magnetic—you’ve arrived at or very near critical temperature. That’s your benchmark.
Once the blade is non-magnetic, permit it to cool by air exposure fully. No quenching. Just let it rest on a steel bench or buried in a sand container for a couple of hours until it returns to ambient temperature. Repeat this procedure two more iterations.
What’s the rationale for three passes? Each repetition further refines the grain composition. The opening pass tackles the principal forging-related stress. The subsequent two passes balance out the remaining grain variation. This minimizes the danger of breaking during hardening and maximizes edge longevity following tempering.
Yes, you’ll invest several hours. Yes, it’s tedious. Yes, the payoff justifies the effort.
Stage 2: Hardening (The Quench)
Locating Critical Temperature (Yet Again, Without Instrumentation)
Following your normalization passes, perform one ultimate heating to critical temperature employing the magnet test. Distribute heat across the blade uniformly—this is essential. The hefty spine lags in heating relative to the slender edge, so concentrate your heat source on the spine more than the edge, or position the spine closer to the heat. Your goal is achieving critical temperature uniformly across the complete blade simultaneously.
Upon reaching non-magnetic state, continue applying heat for an additional 10-15 seconds. You’re aiming to reach beyond critical temperature (add another 25-50°F) to guarantee full austenitization. This signifies the whole crystal arrangement has converted and stands prepared for the hardening sequence. Restraint is crucial—excess heating causes grain enlargement and sacrifices edge retention.
Selecting Your Quench Liquid
This carries greater significance than beginners typically appreciate. Divergent steels require divergent quench velocities.
For 1080, 1084, and 5160 steel: employ warm canola oil or commercial quench oil such as Parks 50. Bring the oil to 120-130°F prior to quenching. I’m being serious—warm it beforehand. Oil at low temperatures quenches excessively rapidly and generates cracking from extreme temperature fluctuation. Warmed oil delivers a gentler quench that’s less unforgiving. Supermarket canola oil suffices for those starting out. It’s economical and readily obtainable.
For W1 and W2 water-responsive steels, or when working with recycled files: immerse in water or saltwater. These materials demand a quicker quench to attain proper hardness. Exercise caution: water quenches substantially quicker than oil, and quicker quenches amplify the likelihood of shape distortion and fracturing. I suggest newcomers begin with oil-quench steels (1080/1084) as they’re comparatively manageable.
Absolutely do not quench in used engine oil. Used engine oil generates hazardous fumes once flames ignite. Commercial quench oil exists for this purpose. Canola oil is secure. Used engine oil carries hazard.
Executing the Quench
Accuracy becomes critical at this moment. Below is your sequence:
Entry via the edge. Introduce the blade into the oil with edge leading at a slant, subsequently bring it vertical. The edge cools quicker than the spine, and command over that progression matters.
Sustain complete immersion. Resist the inclination to agitate—this ranks among the most frequent beginner blunders. Agitation generates inconsistent cooling and distortion. Rather, execute a modest figure-8 motion, maybe just a few inches of motion, adequate to circulate fresh oil around the blade and forestall steam bubble accumulation.
Hold it submerged for no fewer than 10-15 seconds. Many practitioners extend to 20-30 seconds as a safety margin. The blade must solidify fully within the oil before extraction.
Don’t look inside. Don’t tip it to examine it. Leave it submerged and undisturbed.
The Oil Will Ignite
Position a steel cover or sheet metal plate prepared to suppress the blaze. Retain a fire extinguisher accessible—on the workbench nearby, not within your grasp. Use heat-protective gloves and face guard. Conduct this process in open space or a properly aired workshop. Crack the windows. Unlatch the entryway. Oil fumes represent a real hazard.
The blaze will be momentary and typically extinguishes itself. Readiness is essential, though.
Stage 3: Tempering (The Step Everyone Gets Wrong)
Your blade exits the quench vessel. It’s hard. Extraordinarily, glass-hard. And extraordinarily, glass-brittle.
Drop it onto a concrete surface, and it will splinter. Not deform. Not compress. Splinter.
Tempering must commence immediately. Ideally, within 60 minutes post-quench. Extended waiting periods permit internal stress to accumulate. Temper while residual warmth lingers from quenching, or at minimum within several hours.
Temperature Goals
For a multi-purpose blade or outdoor survival knife: 400°F.
For a culinary knife or cooking implement: 375°F. Reduced temperature translates to stronger hardness translates to extended edge life, yet simultaneously more vulnerability to fracture. Priority is sharpness longevity over shock tolerance.
For a splitting tool or hard-labor blade: 425°F. Increased temperature equals diminished hardness equals enhanced suppleness, reduced edge persistence. Appropriate for strenuous applications where durability outweighs maintaining a precision edge.
Rely on a residential oven. I understand—your household will object. Nevertheless, a residential oven represents your most serviceable apparatus. Configure it to your desired temperature and preheat for 20 minutes.
The Double-Pass Temper
This stage gets skipped by most beginners, which is precisely why their blades don’t perform optimally.
Position the blade in the oven at your desired temperature for 60 minutes. Grant it adequate time to attain internal equilibrium. After 60 minutes, withdraw it and permit it to drop to ambient temperature on a workbench. Don’t plunge it—simply let it settle.
Subsequently, reintroduce it to the oven for an additional 60-minute interval at the equivalent temperature. Return to temp, sustain for 60 minutes, let cool to ambient once more.
What’s the objective behind two passes? Throughout the initial temper segment, lingering austenite (intensely hard but marginally fragile residual crystal framework present post-quench) shifts to tempered martensite. However, conversion doesn’t total in a solitary pass. The subsequent pass handles the remainder. A lone pass yields a fragile blade susceptible to becoming compromised with age or mechanical shock. Dual passes create a dependable, robust knife.
Absolutely, you’ll need 3+ hours of oven engagement. No, you cannot shorten the timeline. Absolutely, the expenditure proves worthwhile.
Confirming Your Temper: The File Assessment
Following tempering, the blade has cooled. Now assess the results.
Obtain a polished file (or the undersurface of a discarded knife) and stroke it delicately across the edge surface. The bite should be minimal—it must predominantly glide across the metal with marginal resistance. When the file penetrates readily and strips metal swiftly, overtemper has happened. The material is excessively yielding. Lesser hardness and greater ductility are beneficial for a knife regardless, but excessive file penetration signals forfeited hardness.
When the file moves as though scraping polished glass with barely discernible resistance, potential undertemper exists. Brittleness stays present. Execute a further temper round at 25°F beyond prior (if prior was 375°F, attempt 400°F for an extra rotation). This softens the brittleness minus excessive hardness reduction.
Color Progression While Tempering (Supplementary Yet Informative)
Should you burnish the blade smooth before tempering, you can track the hue shift during warming. Shade variations correspond to distinct temperature bands:
Pale tan or light copper = 400°F
Dark tan = 450°F
Deep red = 500°F
Slate grey = 550°F
Beyond 500°F, material becomes tender. Slate-grey tempered blades lack sufficient hardness for most slicing applications—they perform better suited to flexing devices or mechanisms where bend resilience supersedes sharpness retention.
The pigment technique carries less accuracy than calibrated measurement, yet it furnishes beneficial observation if you monitor the temper while extracting the blade from the oven.
Common Beginner Mistakes (And How to Avoid Them)
1. Uneven Distribution of Heat During Hardening
The substantial spine takes longer to warm than the lean edge. Should you achieve critical temperature along the edge while the spine stays cooler, you’ll encounter lopsided hardness, spawning shape problems. Move your heat predominantly on the spine relative to the edge. Use the magnet assessment on both locations. They need to go non-magnetic at approximately the same instant.
2. Ambient-Temperature Quench Liquid
Room-temperature oil quenches excessively rapidly. Warm it to 120-130°F. A temperature probe aids this. If absent, the oil should feel hot but not steaming. This provides a gentler quench and prevents cracking.
3. Neglecting to Temper
This wrecks most blades. I’ve produced blades that appeared impeccable post-hardening, then disintegrated mid-use since I bypassed or rushed the temper. An unusable knife is the outcome if it fractures while operating. Perform the temper.
4. Single Tempering Pass Only
A sole rotation leaves unreacted austenite that undermines blade consistency. Perform both. Duration is required, yet the return is valuable.
5. Missing the Normalization Rounds
Three normalization passes demand a handful of hours, yet they avert warping and cracking during hardening. They’re mandatory.
Safety Reminders
Operate in an exterior location or a extensively ventilated workspace. Oil fumes present genuine threat. Maintain a fire suppression device rated for combustible liquid blazes (Type B) nearby—accessible in one motion, not in hand. Put on insulating gloves, extended upper body apparel, and protective eyewear. Get a steel plate or metal sheet accessible to extinguish flames. Store a sand bucket adjacent should the blade exit the oil—grab for the cool apparatus, not a red-hot blade.
Final Thoughts
The hardening and tempering phase determines whether most beginner knives endure or collapse. Shaping the metal is theatrical and stimulating. The hardening procedure is systematic and gradual. Nevertheless, this is the moment you demonstrate whether you’ve manufactured an instrument or a decorative piece of steel.
Normalize. Quench. Temper—in duplicate. Validate with a file. Then employ your blade understanding it won’t splinter in use.
That marks the gap between a functional blade and a failed expectation.
—Garrett
Frequently Asked Questions
Why do beginner knife blades shatter after hardening?
Hardened steel becomes glass-brittle without tempering. Most beginners skip or rush the temper cycle, leaving the blade dangerously fragile. Tempering counteracts brittleness by warming the hardened blade to a reduced temperature, trading some hardness for flexibility. This is the step that separates a functional knife from one prone to fracture.
What temperature should I temper my knife blade?
Temperature depends on blade purpose. For a multi-purpose or outdoor survival knife, use 400°F. For a culinary knife, use 375°F. For a splitting tool or hard-labor blade, use 425°F. Lower temperatures preserve hardness and edge life but increase brittleness; higher temperatures add flexibility but reduce edge retention.
Why warm quench oil to 120-130°F before hardening?
Room-temperature oil quenches too rapidly, causing extreme temperature fluctuation that generates cracking. Warming oil to 120-130°F delivers a gentler quench that’s less likely to crack your blade. Use canola oil or commercial quench oil like Parks 50—never use used engine oil, which produces hazardous fumes when ignited.
How many tempering passes does my blade need?
Perform two 60-minute tempering passes at your target temperature, allowing the blade to cool to ambient between passes. A single pass leaves unreacted austenite that undermines blade consistency and durability. The second pass completes the conversion, creating a dependable, robust knife.
Sources and further reading
About This Article

Written by Garrett Dunn. Hobbyist metalworker and garage workshop builder. I restore old tools, weld custom furniture, and document my projects and mistakes so other makers can learn from both. More about this site.
Scope and limits. Garrett is a hobbyist metalworker, not a certified welder or machinist. Welding, grinding, and solvent work carry real injury risk — use the correct PPE and ventilation, and follow the manufacturer safety guidance for your own equipment.
Verify this against a primary source
Specifics change, and your situation may differ from the one described here. These are the authorities worth checking directly:
- OSHA — machine guarding, PPE and shop safety standards
- American Welding Society — welding procedure and safety standards