Cast iron tool surface rust prevention isn’t glamorous. Nobody brags about it at the shop. But I’ve watched guys spend $400 restoring a vintage Delta table saw, skip the maintenance routine, and find orange streaks across that beautiful flat top six weeks later. I was one of those guys — once. That was enough.
Here’s the truth: cast iron rusts fast. Faster than most hobbyists expect, especially in a garage shop where temperature swings are constant and humidity spikes every time it rains. My shop in the Pacific Northwest sits at 60–75% relative humidity for roughly eight months of the year. Without a deliberate protection routine, my Grizzly G1023RL table saw would be a rust farm by March every single year.
This post covers the exact routine I’ve settled on after years of trial, error, and more than a few ruined workpieces. I’ll walk you through surface prep, product selection, application technique, and how often you actually need to repeat the whole process. If you follow this, your cast iron tops will stay clean, flat, and slick for years.
Why Cast Iron Rusts So Aggressively in a Shop Environment
Cast iron is porous at the microscopic level. Unlike cold-rolled steel, cast iron has graphite flakes embedded in its ferrite matrix. Those flakes create tiny channels that hold moisture against bare metal. You don’t need standing water for rust to form. Humidity alone does it overnight.
The other factor is galvanic potential. When cast iron contacts wood — which is slightly acidic — you accelerate surface oxidation. Running green or wet lumber across your planer or jointer introduces both moisture and tannins directly to the surface. That combination is brutal. I’ve seen surface rust develop on an unprotected cast iron jointer bed after a single afternoon milling freshly cut ash.
Temperature cycling makes it worse. When a cold shop heats up in the morning, moisture condenses on every cold metal surface — including your tools. That’s called dew point condensation, and it happens even in relatively dry climates. In my experience, this morning condensation cycle is responsible for more cast iron rust than rainy weather ever is.
Step One: Proper Surface Prep Before Any Protectant Goes On
Applying rust protectant over existing rust accomplishes almost nothing. The protectant seals moisture in rather than out. Surface prep is non-negotiable, and it’s where most hobbyists cut corners.
For light rust — the orange blush you catch early — I start with a Scotch-Brite 7447 maroon pad (ultra-fine, equivalent to 400-grit) and a splash of mineral spirits. Work in circular motions, then switch to long strokes parallel to any machined reference surfaces. This preserves flatness. Never use a random orbital sander on a precision cast iron surface. You’ll round the edges and destroy the flatness spec, which on a quality table saw top should be within 0.003 inches across the full surface.
For heavier rust — pitting, orange crust, anything that survived the maroon pad — move to a Scotch-Brite 7446 gray pad or 220-grit wet-dry paper with mineral spirits. Work methodically. Wipe clean with a lint-free cloth and repeat until the surface shows consistent bare metal. Let it dry fully before moving on. That means at least 20–30 minutes at room temperature.
What to Avoid During Prep
Do not use wire wheels or angle grinders on precision surfaces. I learned this the hard way on an older Powermatic 66 I was restoring for a friend. I used a flap disc at the edges of a rust patch and removed about 0.008 inches of material — enough to affect the fence registration. We spent two hours with a straight edge and feeler gauges confirming the damage. The top needed professional surface grinding to fix it. That was a $180 lesson I won’t repeat.
Also avoid naval jelly or phosphoric acid converters on machined cast iron surfaces. They work chemically by converting iron oxide to iron phosphate, which sounds useful. However, they leave a residue that interferes with subsequent protectant adhesion. Save those products for non-precision surfaces like vise bodies or bar stock.
The Best Products for Cast Iron Tool Surface Rust Prevention
I’ve used nearly everything the shop community recommends. Paste wax. WD-40. 3-IN-ONE oil. TopCote. Johnsons Paste Wax. Bostik. Each has pros and cons, and I’ll give you my honest assessment based on real shop use — not marketing copy.
Paste wax is the old-school standard for a reason. It’s cheap, widely available, and provides decent short-term protection while also reducing friction for workpieces sliding across the surface. However, it breaks down quickly in humid environments. In my shop, paste wax needs reapplication every 4–6 weeks during rainy season. That’s a manageable schedule, but there are better options now.
My current go-to for serious, lasting protection is BOESHIELD T-9 Rust & Corrosion Protection/Inhibitor and Waterproof Lubrication, 12 oz. I started using it about three years ago after a woodworker friend who builds custom furniture commercially recommended it. He’d tried everything and landed on T-9 as his shop standard. I was skeptical — it’s not cheap, and the aerosol format felt fussy at first. After my first full season using it, I was convinced.
Why BOESHIELD T-9 Outperforms Paste Wax in Real Shop Conditions
T-9 was originally developed by Boeing — yes, the aircraft manufacturer — for corrosion protection on aircraft components. The formulation uses a solvent carrier that penetrates micro-surface irregularities, then deposits a waxy protective film as the solvent evaporates. That film bonds to the metal surface rather than just sitting on top of it like paste wax does.
In practice, this means better longevity. On my table saw top, one application of T-9 holds up for approximately 8–10 weeks in Pacific Northwest winter conditions. That’s nearly double what I get from paste wax. It also dries to a non-tacky film, so sawdust doesn’t accumulate on the surface the way it does with oily protectants like WD-40 or 3-IN-ONE.
The 12 oz. aerosol costs around $18–$22 and lasts me roughly six months of regular use across a table saw, bandsaw, jointer, and drill press table. That works out to under $4 per month to protect several hundred dollars worth of cast iron surfaces. For me, that math is simple.
If budget is tight or you only need to protect one small surface, the Boeshield T-9 Aerosol Can (4-Ounce) is the same formula in a smaller can at a lower entry price — usually around $9–$11. It’s a solid option for occasional use or for testing the product before committing to the larger size. I’d recommend the 12 oz. for anyone running a multi-tool shop, though. The per-ounce cost is meaningfully better.
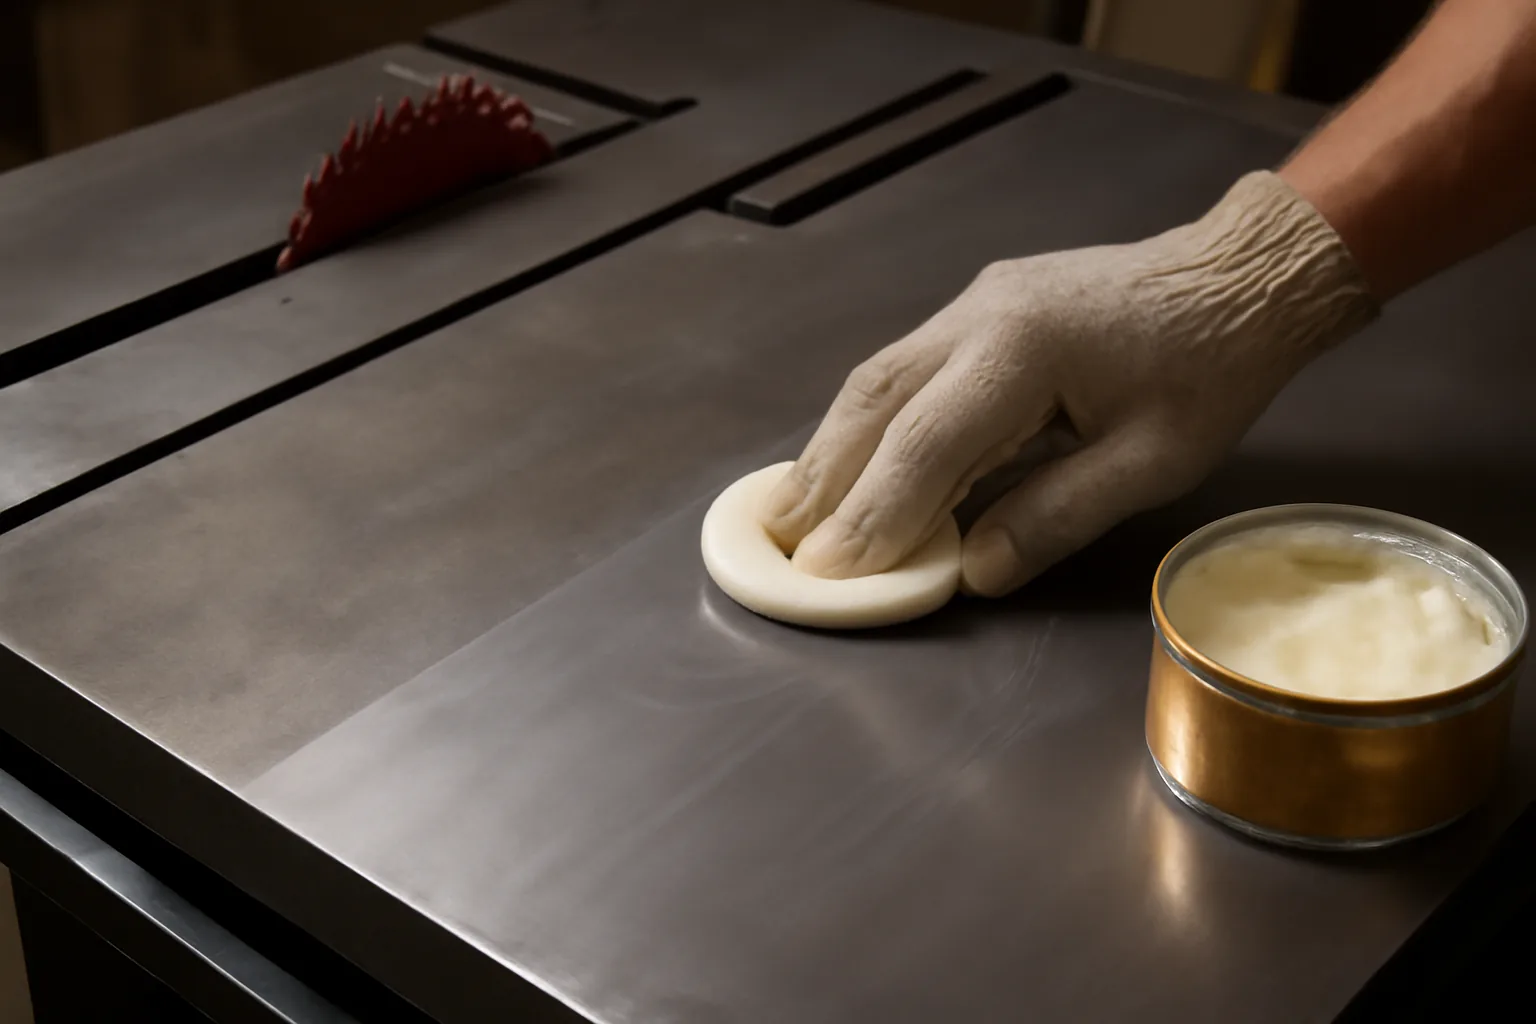
How to Apply the Protectant Correctly
Application technique matters more than most people realize. Slapping product on a clean surface isn’t enough. The goal is uniform coverage with no pooling, no bare spots, and full cure time before the surface sees any workpieces.
Here’s the process I follow every time:
- Wipe the surface with a clean, dry lint-free cloth to remove any dust or debris from prep work.
- Shake the T-9 can thoroughly for 30 seconds. This matters — the solvent and protectant compound separate in storage.
- Hold the can 8–10 inches from the surface. Apply a light, even coat using overlapping passes. You want a thin, wet sheen — not a puddle.
- Let it penetrate for 5 minutes, then buff lightly with a clean cloth to even out the film and remove any excess.
- Allow at least 30 minutes of cure time before using the surface. Full cure for maximum protection takes about 2 hours.
One coat is usually sufficient for routine maintenance. For a freshly restored surface that’s been stripped back to bare metal, I apply two coats — letting the first cure fully before adding the second. That first coat absorbs into the porous cast iron structure. The second coat forms the actual protective film on top.
Safety Notes for Shop Use
T-9 contains petroleum-based solvents. Work in a ventilated space — open the garage door, run a fan. The aerosol is flammable, so keep it away from pilot lights, open flames, and hot surfaces like a running forge or torch setup. The SDS (Safety Data Sheet) classifies it as a Category 1 flammable aerosol. Wear nitrile gloves during application to avoid prolonged skin contact with the solvent carrier. That’s not overprotective — that’s just correct practice.
Dispose of empty cans according to your local regulations. In most municipalities, aerosol cans that are fully empty (no pressure remaining) can go in regular recycling. Partially full cans are considered hazardous waste. Check your county’s household hazardous waste program for drop-off locations.
Building a Maintenance Schedule That Actually Sticks
The best rust prevention routine is the one you’ll actually follow. Elaborate monthly rituals sound great in theory. In practice, most of us are in the shop to build things — not to maintain equipment. So the schedule needs to be simple and tied to things you’re already doing.
Here’s the schedule I’ve settled on over the years:
- After every use: Wipe the cast iron surface with a dry cloth before leaving the shop. Takes 30 seconds. Removes moisture from workpieces and your hands.
- Every 6–8 weeks (dry season): Light re-application of T-9. No prep needed if the surface is still protected — just wipe clean and apply.
- Every 4–5 weeks (wet season or high humidity): Same as above, just more frequently. In my shop, this runs October through March.
- Once per year: Full surface inspection. If I see any rust developing under the protective film, I strip it back with the Scotch-Brite process and start fresh.
I keep a can of T-9 and a stack of lint-free shop cloths right next to each machine. Out of sight means out of mind. When the can is visible, the routine actually happens.
Managing Shop Humidity Year-Round
Protectant alone can only do so much. If your shop runs above 70% relative humidity consistently, you’re fighting uphill. A small dehumidifier changes everything. I run an hOmeLabs 30-pint unit in my 400 sq. ft. garage shop and aim to keep humidity between 45–55%. That range is comfortable for both metal tools and wood stocks. At that humidity level, my cast iron protection intervals stretch significantly.
A digital hygrometer costs under $15 and tells you exactly what you’re dealing with. Measure before investing in dehumidification equipment. Some shops — particularly in drier climates — are naturally well within safe range and just don’t know it.
When to Call a Pro Instead of DIY
Rust prevention and light surface restoration are solidly within DIY territory. However, there are situations where professional intervention is the right call. Knowing the difference saves you money and prevents you from making things worse.
If the cast iron surface has deep pitting — cavities you can feel with your fingernail across the full machined area — surface grinding is needed. This requires a surface grinder, a skilled operator, and precise flatness measurement before and after. A professional machine shop typically charges $80–$150 to resurface a table saw top, depending on size. That’s cheaper than buying a new machine or working with a warped reference surface for the next decade.
Similarly, if you’re dealing with a cracked cast iron top — which does happen with drops or over-tightened hardware — that’s not a DIY repair. Cast iron welding requires specific processes (typically nickel-rod arc welding with pre-heat and controlled cool-down) that most hobbyist welders aren’t set up to execute correctly on a precision surface. I can weld plenty of things in my shop, but I’d send a cracked table saw top to a professional. The flatness requirements are too tight for freehand repair.
Final Thoughts on Cast Iron Tool Surface Rust Prevention
Cast iron tool surface rust prevention comes down to three things done consistently: proper prep, good product, and a realistic schedule. Skip any one of those and you’re back to chasing rust instead of building projects.
The tools in your shop represent real money. More than that, they represent the hours you’ve put into finding them, restoring them, and learning them. A $20 can of T-9 and 15 minutes every six weeks is a negligible investment compared to that.
Start this week. Pull everything out, assess what you have, do the prep, and apply your first coat. Then set a phone reminder for six weeks from now. Future you will walk into a clean, slick-topped shop and wonder why you waited so long to make this a habit.
This post contains affiliate links. As an Amazon Associate, I earn from qualifying purchases at no extra cost to you.