The first time I grabbed a tape measure to size a weld insert for a custom table leg, I was off by almost 3/32 of an inch. That gap cost me an extra hour of grinding and a bead that looked like it was laid by someone wearing oven mitts. That was four years ago. Since then, digital calipers workshop use has become one of the non-negotiables in my garage — right up there with a good angle grinder and a fire extinguisher within arm’s reach. If you’re still on the fence about whether they belong in a hobbyist shop, I’m going to settle that debate today.
A lot of guys in the DIY metalworking space treat calipers as a machinist’s tool — something for the CNC crowd or the guys running a Bridgeport mill. That’s a misconception that’s costing people real time and real money. I restore vintage hand tools, weld custom furniture, and fab small brackets and fixtures out of my two-car garage. My tolerances aren’t NASA-level. However, when you’re fitting a tenon into a socket, drilling a hole for a 5/16-18 bolt insert, or checking wall thickness on salvaged square tube, eyeballing it isn’t good enough.
This post isn’t a lecture on precision measurement theory. It’s a practical look at where digital calipers actually earn their keep in a garage shop, what to look for when you buy one, and which model I’ve been reaching for almost every single session for the past two years. Let’s get into it.
What a Digital Caliper Actually Does for a Garage Metalworker
A digital caliper measures outside dimensions, inside dimensions, depth, and step distances — all from one tool. Most 6-inch models resolve to 0.0005 inches, or about 0.01mm. For reference, a standard human hair is roughly 0.003 inches thick. That’s the level of precision you’re holding in your hand for under $30.
In practical shop terms, that means I can confirm whether a piece of cold-rolled flat bar is actually 1/4 inch thick before I spec a weld joint around it. Spoiler: it often isn’t. Material labeled “1/4 inch” can run anywhere from 0.240 to 0.257 inches depending on the mill tolerance band, which for hot-rolled steel follows ASTM A6 standard allowances. That variation matters when you’re fitting parts together or calculating load-bearing cross-sections.
Beyond metals, I use calipers constantly on wood joinery, checking bolt diameters before threading, and measuring drill bit shanks when my label has worn off. In my experience, the single measurement I take most often is outside diameter on round stock. A quick jaw-to-jaw check confirms whether I’ve got genuine 3/4-inch solid rod or some undersized import substitute.
Where Digital Calipers Workshop Use Actually Pays Off
Let me give you three specific scenarios where my calipers saved a project — or at least saved me from re-buying material.
Fitting Salvaged and Vintage Material
I restore old tools. Last fall I was rebuilding a Delta Rockwell drill press from the mid-1960s. The quill housing needed a replacement bushing, and the original blueprints weren’t exactly floating around the internet. I measured the bore with the inside jaws: 0.876 inches. That told me immediately it wasn’t a standard 7/8-inch fit — it was worn. Knowing the exact number meant I could order the right oversized bronze bushing instead of guessing and paying return shipping twice.
Salvaged steel from demolition sites or farm auctions is almost never what it looks like. I’ve pulled angle iron that measured out to actual metric sizing — 25mm legs instead of 1 inch. That’s a 0.016-inch discrepancy. Small? Sure. Enough to blow a tight joint? Absolutely.
Drilling and Tapping Accurate Holes
Tap drill charts give you recommended drill sizes for threading, but they assume your drill bits are accurate. Cheaper drill sets can run undersize by 0.003 to 0.005 inches. That sounds trivial until your 75% thread engagement drops to 60% because you were working from a worn bit. Checking your drill bit diameter with calipers before you plunge takes about four seconds. I do it every time on critical holes.
For example, drilling for a 1/4-20 thread requires a #7 drill at 0.201 inches. If your bit measures 0.196, you’re going to fight that tap and risk breaking it in the workpiece. Ask me how I know. I snapped a 1/4-20 tap in a piece of 1/4-inch mild steel plate on a Saturday afternoon because I skipped that check. Getting it out took 45 minutes with an extractor set and a lot of patience.
Welding Fixture and Furniture Work
When I’m building welded furniture, consistency matters for aesthetics as much as function. A dining table with legs that vary by 1/8 inch in cross-section looks sloppy, even if it’s structurally sound. Calipers let me match pieces from different drops and offcuts before I weld them into an assembly. That saves grinding time and prevents the “close enough” regret that hits you when the client sees it under good lighting.
The depth rod on a caliper is also genuinely useful for setting router depths, checking mortise depth on hybrid metal-wood joints, and verifying counterbore depth so a bolt head sits flush. These are small things. However, they’re the difference between a piece that looks professional and one that looks homemade — and not in a good way.
Dial vs. Vernier vs. Digital: Which One Actually Belongs in Your Shop
There are three types of calipers: vernier (manual graduated scale), dial (analog needle readout), and digital (LCD). Each has legitimate advocates. Here’s my honest take after using all three.
Vernier calipers require no battery and never drift. They’re the gold standard for durability. That said, reading one accurately under a shop light at 10pm with grinding dust in your eyes is genuinely difficult. The resolution is typically 0.001 inches, which is excellent, but the reading process adds time and introduces human error. For production inspection work, I get it. For a garage hobbyist, the learning curve isn’t worth it.
Dial calipers are fast and easy to read. They’re also more fragile than digital models — the rack gear that drives the needle is vulnerable to swarf and impacts. I’ve had two dial calipers develop sticky needle movement after shop contamination. Repair isn’t impossible, but it’s fiddly. Digital calipers, specifically stainless steel jaw models, handle shop abuse better than most people expect.
Digital wins for garage use. Fast readout, instant inch/mm conversion, easy zeroing at any position for relative measurements — the practical advantages are real. The one legitimate criticism is battery dependency. My answer to that: keep a spare CR2032 battery taped inside your tool cabinet. Problem solved.
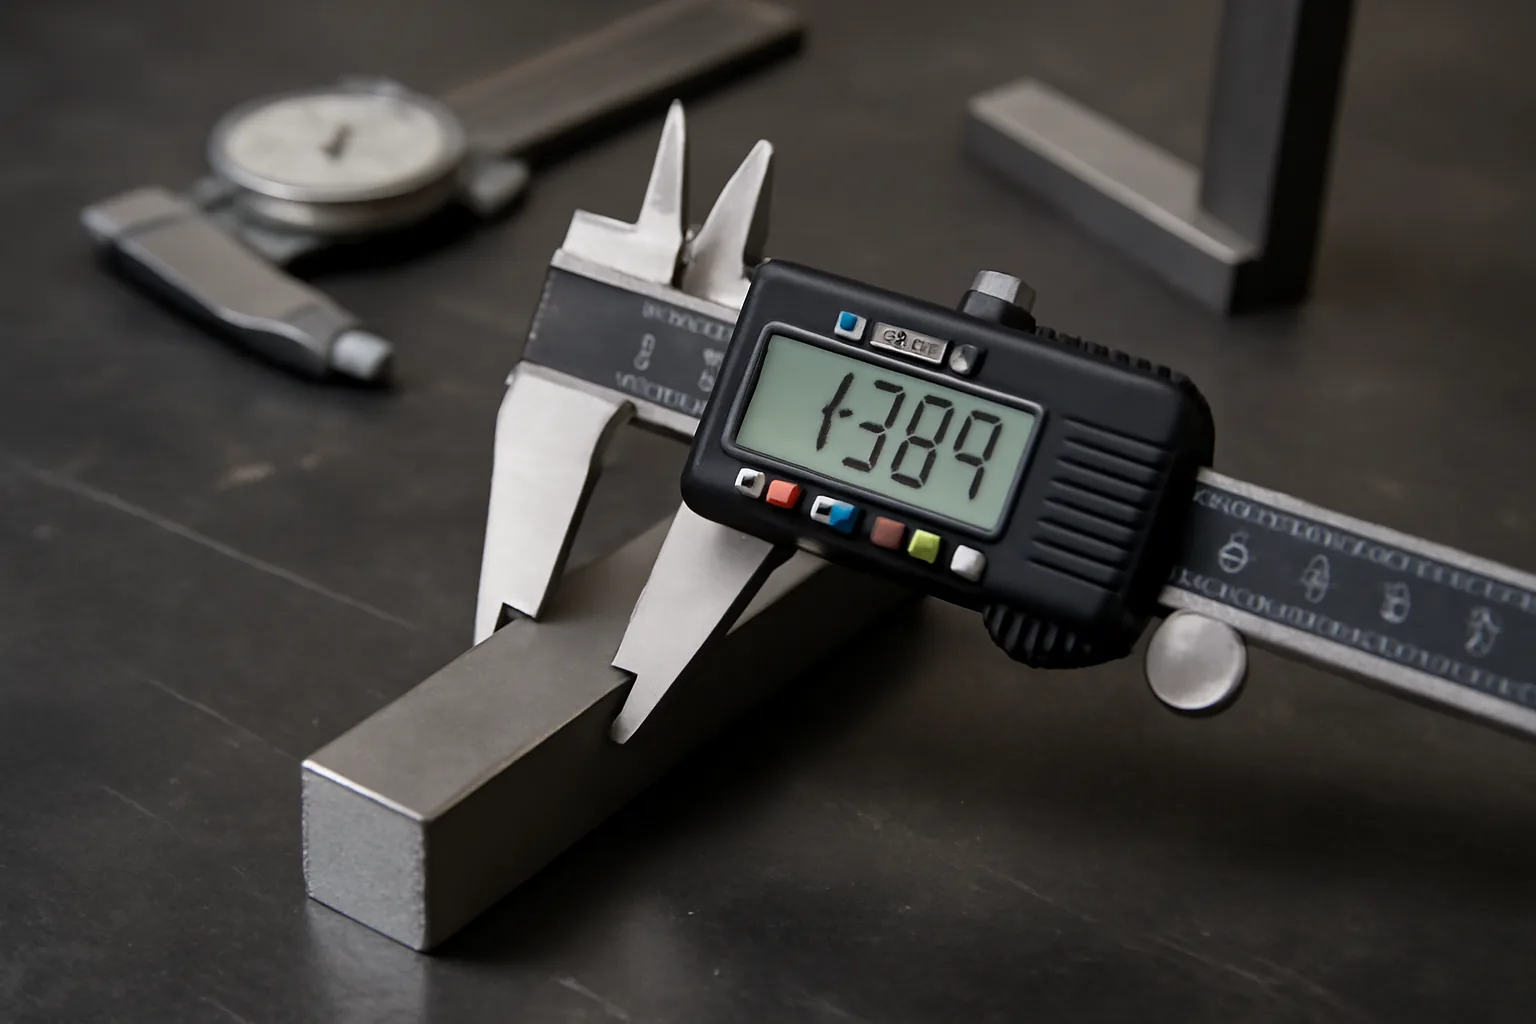
The Caliper I Actually Use: NEIKO 01407A Review From Two Years of Shop Use
I’ve owned four digital calipers. Two were sub-$15 imports that drifted out of calibration within a month. One was a Mitutoyo 500-series that I still use for precision work — but at $120+, it’s not my everyday grab-and-measure tool. The one that lives on my bench daily is the NEIKO 01407A Electronic Digital Caliper.
I picked it up about two years ago for around $25. Stainless steel construction, large LCD screen, and a quick-change button that cycles between inches, fractions, and millimeters. That fraction mode is genuinely useful when you’re working from plans that use fractional inch dimensions — you don’t have to do the decimal conversion in your head while managing a workpiece.
The jaws are hardened stainless and have held up through regular contact with steel, aluminum, and cast iron surfaces without visible wear. Calibration has stayed consistent against my Mitutoyo reference — I check it monthly. The battery life on a single CR2032 runs about six months in my shop with moderate daily use. Auto-off kicks in after a few minutes of inactivity, which helps.
Specific numbers: 6-inch range, 0.0005-inch resolution, ±0.001-inch accuracy per the spec sheet. That accuracy spec aligns with what I see in practice. It’s not a calibrated laboratory instrument. However, for shop work where you’re chasing tolerances in the 0.005 to 0.020 inch range, it performs reliably. I’ve used it on probably 300 or 400 individual measurements and it hasn’t let me down.
The one honest critique: the depth rod is a bit narrow and can rock slightly on small-diameter holes, introducing a few thousandths of error. For critical depth measurements, I double-check with a dedicated depth gauge. For general use, it’s perfectly adequate.
Budget Alternative Worth Knowing About
If you want to spend slightly less or want a second caliper for a different workstation, this stainless steel digital caliper with auto-off and inch/mm conversion is a solid runner-up. Similar feature set, comparable construction quality, and priced competitively. I haven’t used it as extensively as the NEIKO, but based on specs and user feedback it handles general DIY and household work well. Good option if the NEIKO is out of stock or you want a spare.
How to Use a Digital Caliper Correctly (Mistakes I See All the Time)
Owning a caliper and using it correctly are two different things. Here are the errors that actually affect your readings.
- Not zeroing before you measure. Always close the jaws completely, verify the display reads 0.000, then open and measure. A dirty jaw contact point can give you a false zero.
- Applying too much closing force. Calipers measure contact, not clamping pressure. Light, consistent jaw contact gives repeatable readings. Mashing the jaws down compresses soft materials and deflects the beam slightly.
- Measuring hot material. Thermal expansion is real. Steel expands roughly 0.0000065 inches per inch per degree Fahrenheit. A piece of 6-inch flat bar that’s 50°F above ambient has grown about 0.002 inches. Let parts cool to room temperature before checking critical dimensions.
- Ignoring jaw parallelism. For inside measurements, make sure both inside jaw tips contact the bore evenly. A tilted caliper reads larger than actual.
- Dropping them on concrete. This one hurts every time. Even stainless calipers can shift calibration after a hard drop. Check against a known reference after any drop.
I learned the thermal expansion issue the hard way. I was checking tubing wall thickness immediately after cutting with an abrasive chop saw. Got a reading of 0.118 inches, built my joint around that number, and ended up with a loose slip fit once everything cooled. The actual wall thickness was 0.115 inches. Three thousandths of an inch, $40 in wasted material, and two hours of rework. Now I give fresh cuts at least 10 minutes to stabilize before measuring.
When to Skip the Calipers (And When You Really Can’t)
To be fair, there are jobs where calipers are overkill. Rough layout work, general cutting to length within 1/16 inch, and most structural weld prep don’t require 0.001-inch resolution. A good tape measure and a combination square handle those tasks faster.
However, there are specific situations where skipping the calipers is a mistake you’ll pay for. Threading work, bearing and bushing fits, hydraulic fitting connections, and any assembly where parts must interchange — these all justify the few seconds it takes to verify a dimension precisely. Specifically, if you’re working with any pressure-bearing hydraulic or pneumatic fittings, dimensional accuracy isn’t just about fit quality. It’s a safety issue. An undersized or oversized fitting can fail under pressure, and that failure can be violent.
If you’re doing structural fabrication beyond hobby furniture — handrails, mezzanine supports, trailer hitches — consult a certified welding inspector (CWI) or structural engineer for joint design. My garage setup isn’t a substitute for AWS D1.1 structural welding code compliance on anything load-critical. Know where DIY ends and professional sign-off begins.
Final Thoughts on Digital Calipers Workshop Use
Here’s the straight answer to the question in the title: not overkill. Worth it. Every time.
Digital calipers workshop use pays for itself the first time you catch a bad material dimension before it becomes a bad weld. At $20–$30 for a quality stainless model, the cost is lower than a single bad piece of DOM tubing or a broken tap. The learning curve is about 15 minutes. The payoff is every project after that running tighter, cleaner, and with fewer do-overs.
Start with the NEIKO 01407A. It’s what I reach for on 90% of my measurements, it’s held up through two years of regular shop use, and the inch/fraction/mm quick-change function is genuinely useful for the way hobbyist metalworkers actually work. Keep it in a protective case when not in use, check it against a reference block occasionally, and replace the battery once a year whether it needs it or not. That’s the whole maintenance plan.
Stop eyeballing dimensions you should be measuring. Your welds, your fits, and your finished pieces will show the difference.
This post contains affiliate links. As an Amazon Associate, I earn from qualifying purchases at no extra cost to you.