A dull saw blade gets replaced. A dirty saw blade gets blamed for being dull — and that’s a mistake I made for longer than I’d like to admit. The first time I actually cleaned saw blade resin buildup off one of my older Freud blades, I was stunned. The thing cut like it had just come out of the box. No new blade purchase. No resharpening fee. Just fifteen minutes and a few bucks’ worth of cleaner. That one experience changed how I maintain every blade in my shop.
Pitch and resin buildup is the silent killer of saw blade performance. It collects on carbide teeth and plate surfaces every time you cut pine, MDF, plywood, or any wood with natural resins. Over time, that gummy black coating creates friction, generates heat, and forces your motor to work harder. You end up with burning, tearout, and ragged cuts — all symptoms people chalk up to a worn-out blade.
I run a small garage shop where I restore vintage tools and weld custom furniture pieces. Saw blades take a beating here. After years of trial and error, I’ve dialed in a cleaning process that keeps my blades performing at full capacity without spending money on replacements before their time. Here’s everything I’ve learned — including the mistakes I made along the way.
Why Resin and Pitch Build Up in the First Place
Wood contains natural resins, sap, and oils. When you cut through it, especially softwoods like pine, cedar, or fir, those compounds get exposed to heat and friction. They transfer onto your blade and bake on. Engineered sheet goods like MDF and melamine add glue binders to the mix. The result is a hard, sticky black coating on your carbide teeth and blade body.
This buildup does three things that hurt your cuts. First, it increases the effective kerf width, making your blade drag through material. Second, it insulates the carbide tips, trapping heat that accelerates tip wear. Third, it changes the geometry of the cutting edge by coating the face and top of each tooth. Even a thin layer of pitch can measurably affect how a blade tracks and clears chips.
In my experience, blades cutting pine or pressure-treated lumber need cleaning every 8 to 10 hours of use. Blades running hardwoods like oak or walnut can go 15 to 20 hours before buildup becomes a real problem. MDF is the worst offender — I’ve had blades get visibly coated after just 3 to 4 hours of sheet goods cutting. Frequency matters more than most hobbyists realize.
How to Spot a Blade That Needs Cleaning (Not Sharpening)
Before you pull out a cleaner or call a sharpening service, inspect the blade up close. Remove it from the saw first — always disconnect power at the switch and unplug the machine before blade removal. Lay the blade flat on a light-colored surface. Look at the carbide tips under direct light. If you see dark brown or black coating on the tooth face or top, that’s resin, not wear.
Dull teeth look silver and shiny where the carbide has worn. Dirty teeth look brown and dull because of the coating. Run your fingernail across a few teeth. Pitch buildup feels sticky and rough. Worn carbide feels smooth and rounded. This one test has saved me from unnecessary sharpening costs more times than I can count. A professional resharpening runs $15 to $40 per blade depending on tooth count. Cleaning costs pennies.
Also check the blade plate between the teeth. Heavy pitch deposits there create side friction during the cut, which causes burning on the workpiece face. That symptom — black scorch marks along a cut line — almost always points to a dirty blade rather than a dull one. Specifically, it happens most often on the last few inches of a rip cut where the blade is fully engaged.
Step-by-Step: How to Clean Saw Blade Resin Buildup
The process is straightforward. You don’t need special equipment or a lot of time. I do this at my workbench in about 15 minutes per blade. Here’s the method I’ve settled on after trying several approaches over the years.
- Remove the blade safely. Disconnect power. Use the correct arbor wrench for your saw. Set the blade on a rubber mat or folded shop towel to protect the teeth.
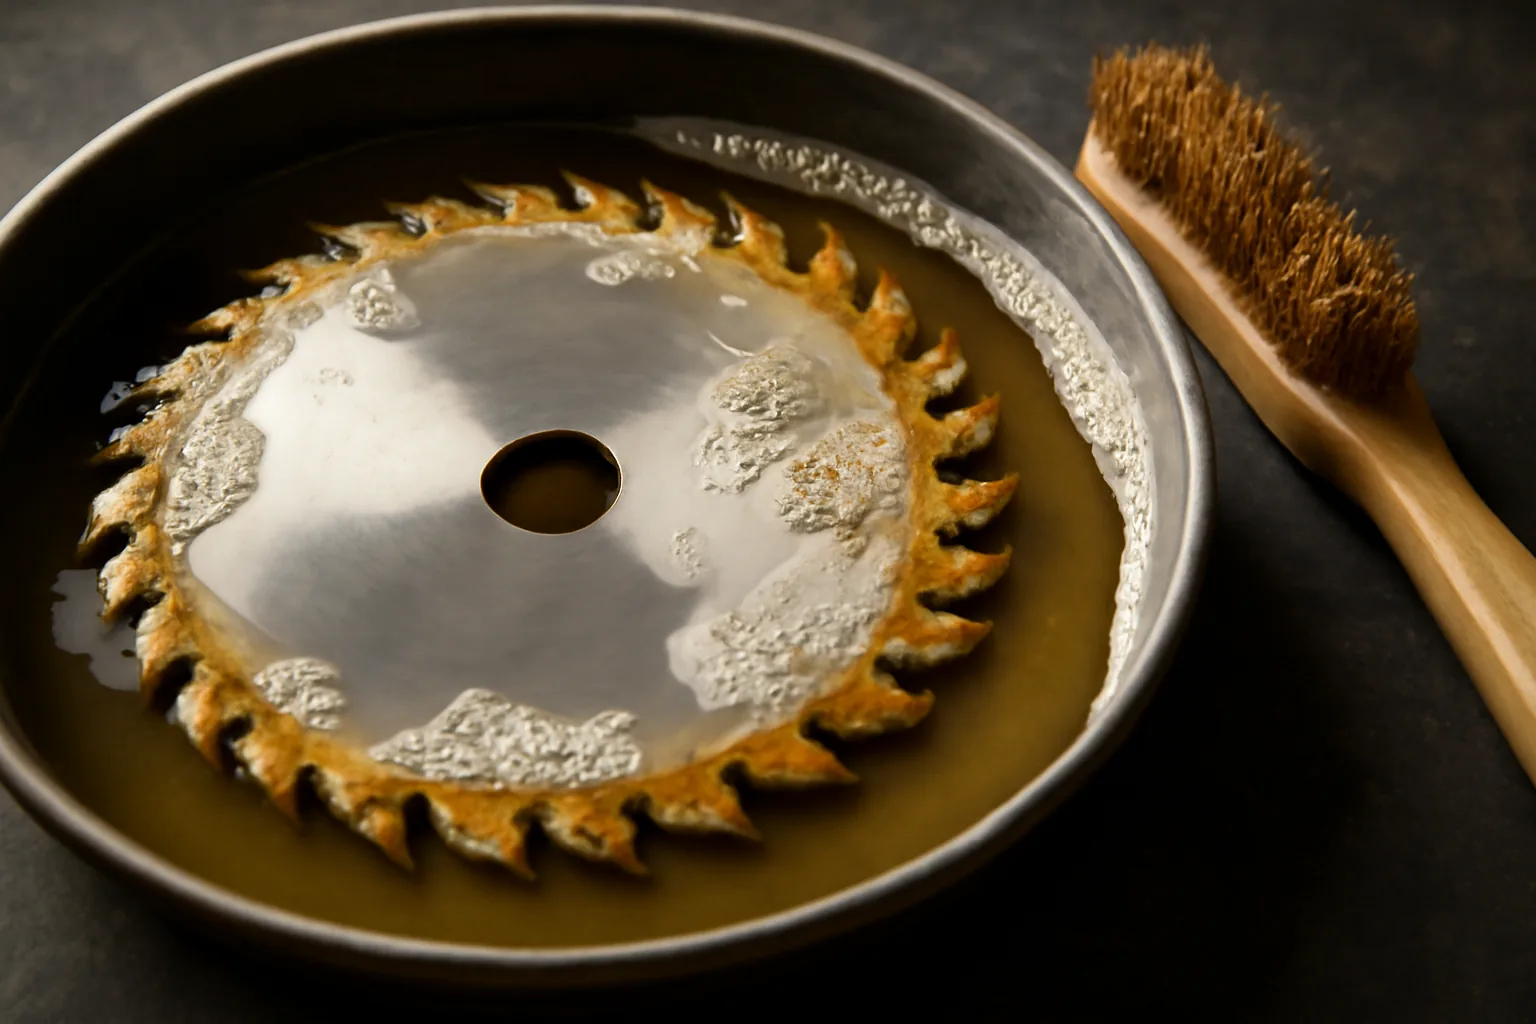
- Choose a non-metallic soaking tray. A shallow plastic lid or dedicated plastic tray works well. Avoid metal pans — some cleaners react with aluminum.
- Apply your blade cleaner. Spray or pour enough cleaner to coat both sides of the blade. Make sure you cover the carbide teeth and the plate fully.
- Let it soak 3 to 5 minutes. For heavy buildup, go up to 10 minutes. The cleaner needs time to break down the resin bonds.
- Scrub with a stiff nylon brush. Work around the teeth in the direction of the cutting edge — never against it. A brass wire brush works too, but avoid steel bristles on carbide.
- Rinse with water. Most quality blade cleaners are water-soluble. Rinse thoroughly and check that all residue is gone.
- Dry immediately and apply a light coat of blade wax or protectant. This prevents flash rust on the steel plate and helps resist future buildup.
I learned the hard way not to skip step seven. The first time I cleaned a blade properly, I set it aside wet and came back an hour later to a ring of surface rust on the plate. It didn’t ruin the blade, but it was a lesson. A quick wipe with a blade-and-bit wax or even a thin coat of paste wax takes 30 seconds and protects your investment.
The Cleaner I Actually Use and Trust
I’ve tested several blade cleaners over the years. Some are aggressive but harsh — I don’t want solvents with strong fumes in an enclosed shop, and I don’t want anything that could degrade the brazing that holds carbide tips to the blade body. That narrows the field considerably.
The product I reach for consistently is the TREND Tool, Blade & Bit Cleaner (CLEAN/500), 18 fl oz. I’ve used it on table saw blades, miter saw blades, and router bits for several years now. It’s non-toxic, biodegradable, and safe to use without heavy-duty respiratory protection in a ventilated space. That matters when you’re working in a closed garage in January.
The TREND CLEAN/500 formula works by breaking down the chemical bonds in resin and pitch without attacking the carbide brazing. I’ve soaked some heavily coated blades — ones that looked almost beyond saving — and pulled them out looking nearly new. It also handles rust spots on the blade plate, which is a bonus for anyone restoring older tools like me. An 18-ounce bottle runs me about $18 to $22 and lasts through 20 to 30 cleaning sessions depending on how generously I apply it. That math is hard to argue with.
For anyone working with a tighter budget, the CMT Formula 2050 Blade and Bit Cleaner is a solid runner-up. It performs well on moderate buildup and costs a few dollars less per bottle. However, in my side-by-side tests on heavily coated blades, the TREND formula cuts through stubborn deposits faster. For routine maintenance cleaning, CMT 2050 is a perfectly good choice.
What to Avoid When Cleaning Saw Blades
A few common cleaning approaches can damage your blades or void warranties. Avoid oven cleaner (lye-based formulas attack carbide brazing over time). Skip lacquer thinner or acetone for routine cleaning — they work fast but the fumes are genuinely dangerous in shop environments, and they can degrade blade expansion slots on some designs. Never use a steel wire brush directly on carbide teeth. The bristles can micro-chip the cutting edge.
I’ve also seen people suggest soaking blades in WD-40. Don’t do it. WD-40 is a water displacer and light lubricant, not a pitch solvent. It leaves an oily residue that attracts sawdust and actually speeds up future buildup. Use a proper blade and bit cleaner designed for the task.
How Often Should You Clean Your Blades?
There’s no universal answer, but there are reliable indicators. Watch for these signs that a cleaning is overdue: visible dark deposits on the teeth, burning or scorching on cut surfaces, increased motor strain (your saw sounds labored), or a cut that requires noticeably more feed pressure than usual.
As a baseline schedule, I clean any blade that’s been running pine, cedar, or sheet goods after every project or every 6 to 10 hours of use. Hardwood blades get cleaned every 15 to 20 hours. Router bits — which are tiny compared to saw blades but just as prone to resin buildup — get cleaned every 3 to 5 hours because even small deposits affect cut quality on joinery work.
Storing blades properly also extends the time between cleanings. I hang mine vertically on a dedicated blade rack — never stacked flat. Stacking blades lets teeth contact the plate of the next blade, which can micro-chip carbide. Vertical storage also prevents moisture pooling and reduces flash rust risk. A simple pegboard rack with 3/8-inch wooden dowels works perfectly and costs almost nothing to build.
When Cleaning Isn’t Enough: Honest Advice on Sharpening and Replacement
Cleaning restores a dirty blade. It cannot restore a worn one. If you’ve cleaned your blade thoroughly and it still burns, drags, or produces rough cuts, the carbide tips may genuinely be dull. At that point you have two options: professional resharpening or replacement.
Professional resharpening is worth it for quality blades. A Freud LU83R010 or Diablo D1060X — blades that cost $60 to $100 new — are absolutely worth a $20 to $35 resharpening. Most quality carbide blades can be resharpened 3 to 5 times before the tooth geometry degrades beyond usable. That extends the blade’s effective lifespan by years and saves real money over time.
However, budget blades — the $15 to $25 house-brand options from big box stores — are often not worth resharpening. The carbide quality is lower and the cost of sharpening approaches replacement cost. In that case, replace and move up to a better blade. You’ll notice the difference immediately.
If you see missing carbide tips, cracked tip brazing, or a warped blade plate, stop using the blade immediately. These are safety issues, not maintenance issues. A carbide tip that separates at 4,500 RPM becomes a projectile. No cleaning or sharpening fixes structural damage. Replacement is the only correct answer.
Final Thoughts on How to Clean Saw Blade Resin Buildup
Cleaning saw blade resin buildup is one of the highest-return maintenance tasks in a woodworking shop. It takes 15 minutes, costs less than a dollar per cleaning when you buy a good cleaner, and it can make a $80 blade perform like it just came out of the package. I’ve extended the service life of good blades by years using nothing more than a proper cleaner, a nylon brush, and consistent habits.
The TREND CLEAN/500 is the product I trust for this job. It’s non-toxic, effective on heavy deposits, and safe to use in an enclosed shop without a full respirator. For lighter maintenance or budget-focused shops, the CMT Formula 2050 is a worthy alternative. Either way, use a purpose-built cleaner — not household solvents or improvised solutions.
Make blade cleaning a habit, not an afterthought. Your saw will run smoother, your cuts will look cleaner, and your blades will last significantly longer. That’s the kind of simple, consistent maintenance that separates a functional shop from a frustrating one.
This post contains affiliate links. As an Amazon Associate, I earn from qualifying purchases at no extra cost to you.