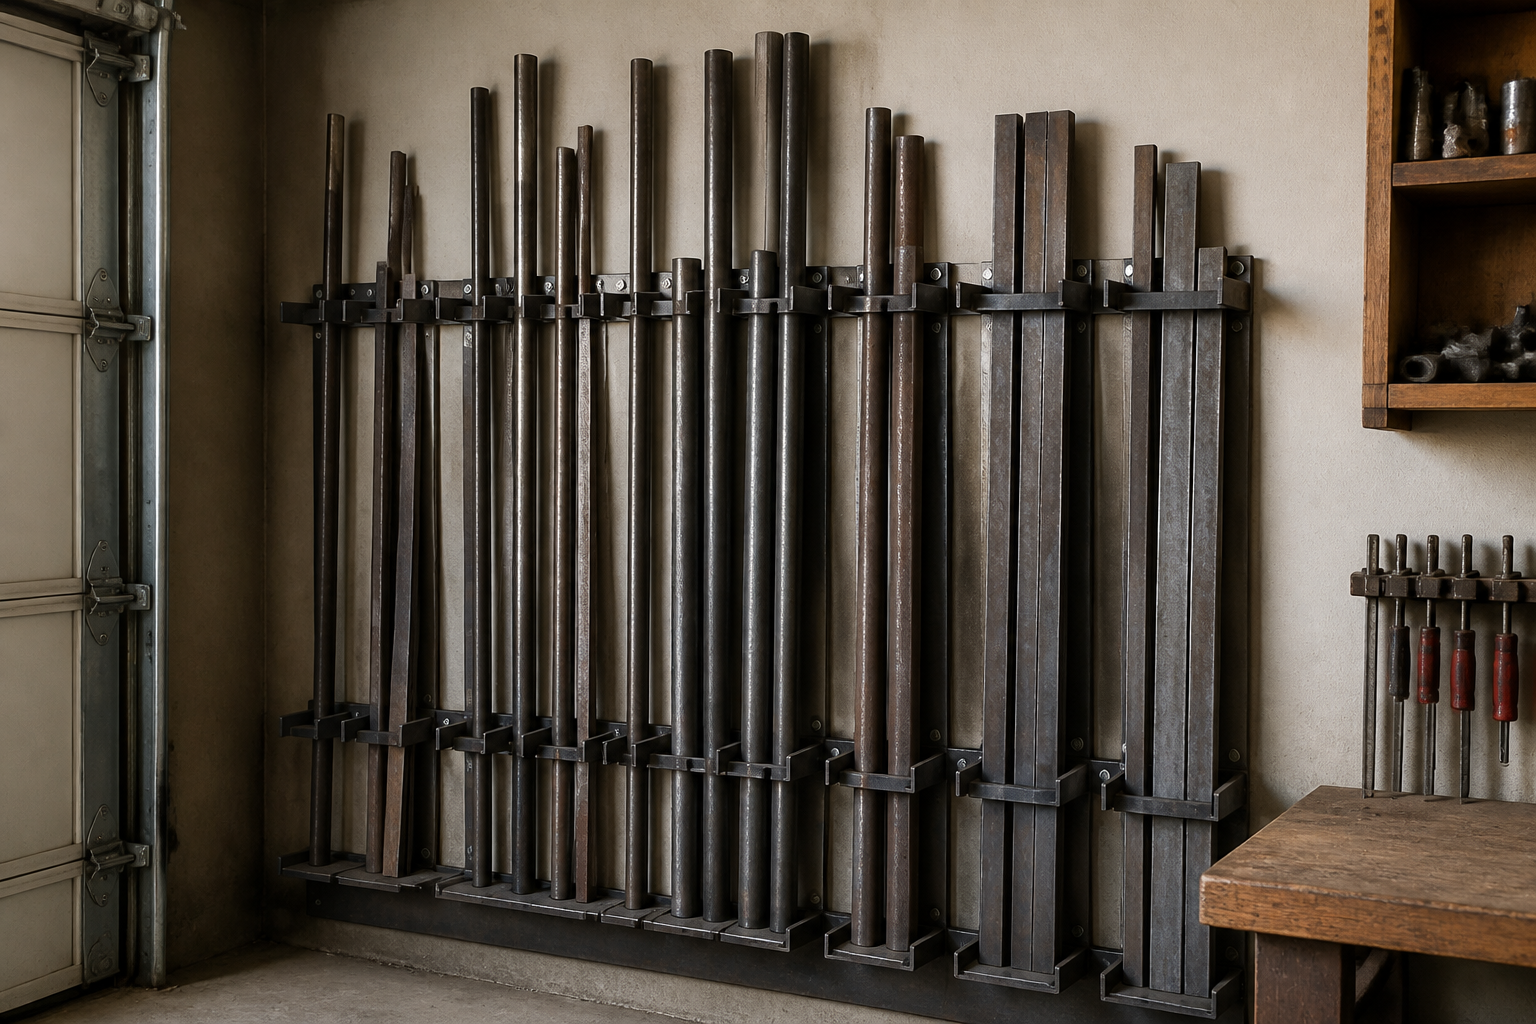
A cluttered shop floor costs you time every time you need a piece of flat bar or round stock. You dig through piles, forget what you have, buy duplicates, and trip over stacks. Organized storage also means you can see what’s actually on hand—and work safely around it instead of stepping over hazards.
The good news: you don’t need expensive industrial shelving or cable systems. Angle iron, basic wall-mounted bins, and a few horizontal racks built from scrap stock are enough to transform chaos into a working system. This post covers three setups I’ve built and tested, ranging from wall-mounted to floor-based, so you can pick what fits your space and budget.
The Foundation: What You’re Storing and Why It Matters
Before you build anything, think about what you actually keep on hand. Most hobbyist shops end up with:
- Flat bar in various widths and thicknesses
- Round stock (rod, pipe, tubing)
- Angle iron in different sizes
- Offcuts from finished projects
- Specialty shapes (channel, square tubing)
The problem isn’t just clutter—it’s that these materials take up serious floor and wall space, and stacking them wrong can cause injury. A piece of angle iron or round stock can roll unexpectedly. Flat bar stacked carelessly leans and falls. You need a system that lets you grab what you need without dislodging everything else.
Wall-Mounted Horizontal Racks: Start Here
The cheapest and most space-efficient option is a wall-mounted rack for flat bar and smaller stock. This gets material off the floor and makes it visible at a glance.
What you need:
- Angle iron (2×2 or 2.5×2.5, depending on load)
- Bolts, washers, and lock nuts (grade 8 minimum)
- Wall studs (or masonry anchors rated for the weight)
- A level
How to build it:
- Measure and mark stud locations on your wall. You’ll need at least two studs for any rack longer than 3 feet.
- Cut angle iron to length—usually 16 to 24 inches deep works well for a garage.
- Drill holes through the vertical flange of the angle iron. Space bolts 12 to 16 inches apart.
- Bolt the angle iron to the studs. Make sure the horizontal flange points outward to hold stock.
- Use a level. Seriously—even a slight tilt will cause flat bar to slide.
Stack flat bar horizontally on the flange, with thin pieces nested on top of thicker ones to save space. For round stock and smaller pieces, install a second level of angle iron or run steel rods through the flange as dividers.
Capacity and spacing:
Two bolted angle-iron racks can safely hold several hundred pounds if attached to solid studs. Space them 18 to 24 inches apart vertically, depending on the height of your material and how much you want to stack.
I’d start with one rack and add more if you need them. It’s easier to expand than to take down an overbuilt system that’s in your way.
Floor-Based Storage: The Angle-Iron Frame Rack
For larger stock and heavier pieces, a floor rack keeps material organized and accessible without using wall space. The frame is simple: angle iron bolted or welded at the corners, with horizontal supports every 12 to 18 inches.
Basic design:
- Four vertical legs (angle iron, 3×3 or 4×4, roughly 4 feet tall)
- Top and bottom frames connecting the legs
- Cross-supports running front to back
Weld or bolt the frame together. The key is keeping it stable—use diagonal bracing or make sure the bolts are tight enough to prevent racking (twisting) under load.
Organizing by material type:
Dedicate shelves or sections to different sizes:
- Flat bar: Stack horizontally, thinnest on top, thickest on bottom. This prevents warping and makes smaller pieces easy to spot.
- Round stock: Lay pieces in a V-groove or use a horizontal rod to prevent rolling. Smaller diameter material on top, larger below.
- Angle iron: Stand it upright in dividers, or lay it flat if space allows. Mark sizes with paint or tape so you don’t have to measure every time.
Height and depth considerations:
A rack 4 feet tall and 18 inches deep works well for most garage spaces. Taller racks become unstable without serious bracing; deeper racks make it hard to reach the back. Build within those ranges and add more racks if you need more volume.
Wall Bins and Pegboard: For Offcuts and Small Stock
Offcuts pile up fast. Instead of letting them scatter across the floor or a corner, use wall-mounted bins or a pegboard system. This frees up floor space and keeps small material sorted and findable.
Bin organization:
- Label bins by material type and size (flat bar 1/8×2, round 1/2, etc.)
- Group similar sizes together so you can see at a glance what’s on hand
- Mount bins at waist height for easy access
You can buy simple wire or plastic bins, or build wooden boxes from scrap and mount them on angle-iron brackets. Either way, the goal is visibility and quick access.
Pegboard alternative:
Pegboard with hooks and small shelves works well for rod, small bar stock, and fasteners. It doesn’t take much weight, but for organizing bits and pieces, it’s fast and cheap to set up.
Comparison: Three Storage Setups
| Setup | Best For | Cost | Space Use | Capacity |
|---|---|---|---|---|
| Wall-mounted racks | Flat bar, thin stock | $50–150 | Very efficient | Medium (100–300 lb per rack) |
| Floor frame rack | Mixed sizes, heavy material | $100–300 | Floor footprint | High (500+ lb) |
| Wall bins & pegboard | Offcuts, small pieces | $30–100 | Vertical wall space | Low to medium |
Most shops benefit from combining all three: wall racks for frequent stock, a floor rack for bulk material, and bins for offcuts.
Installation Tips and Safety
Before you bolt anything to your walls, locate studs. Drywall anchors alone won’t hold hundreds of pounds. If your shop is in a basement or garage with masonry, use bolts rated for masonry and plan for at least four anchor points per rack.
Level everything. A rack that’s even 1 or 2 degrees off will cause material to shift and slide. Use a proper level, not your eye.
Bolt connections should be tight enough that you can’t move them by hand, but don’t over-torque and strip threads. A wrench set and a set of lock nuts prevents bolts from working loose over time.
Keep the floor around racks clear. Tripping over loose offcuts next to a stored pile is a quick way to get hurt. Sweep regularly and put scrap in a bin immediately.
Starting Small and Expanding
You don’t need a perfect system on day one. Build one wall rack, see how it works, and add racks or floor storage as your collection grows. Most hobbyists find that a single wall rack plus one floor rack handles most of their stock efficiently.
Start with the materials you have on hand right now. Measure your most common sizes, then design a rack that fits those pieces first. You can adjust or expand later.
Organizing metal stock doesn’t require expensive equipment or a large budget. Simple angle-iron racks, bolted to walls or standing on the floor, keep material accessible, save space, and make your shop safer. Build what you need, level it properly, and you’ll spend less time hunting for the right piece and more time building.
About This Article

Written by Garrett Dunn. Hobbyist metalworker and garage workshop builder. I restore old tools, weld custom furniture, and document my projects and mistakes so other makers can learn from both. More about this site.
Scope and limits. Garrett is a hobbyist metalworker, not a certified welder or machinist. Welding, grinding, and solvent work carry real injury risk — use the correct PPE and ventilation, and follow the manufacturer safety guidance for your own equipment.
Verify this against a primary source
Specifics change, and your situation may differ from the one described here. These are the authorities worth checking directly:
- OSHA — machine guarding, PPE and shop safety standards
- American Welding Society — welding procedure and safety standards